Having decided to move from the US to the UK at the end of 2024 for an as-yet undecided amount of time, we made the move at the beginning of April 2025. Seeing as I’m British and Shae (an American) had lived in the UK for the first five years of our marriage, moving back wouldn’t – in theory – be any problem.
There was a snag though.
Our dog Truffles.
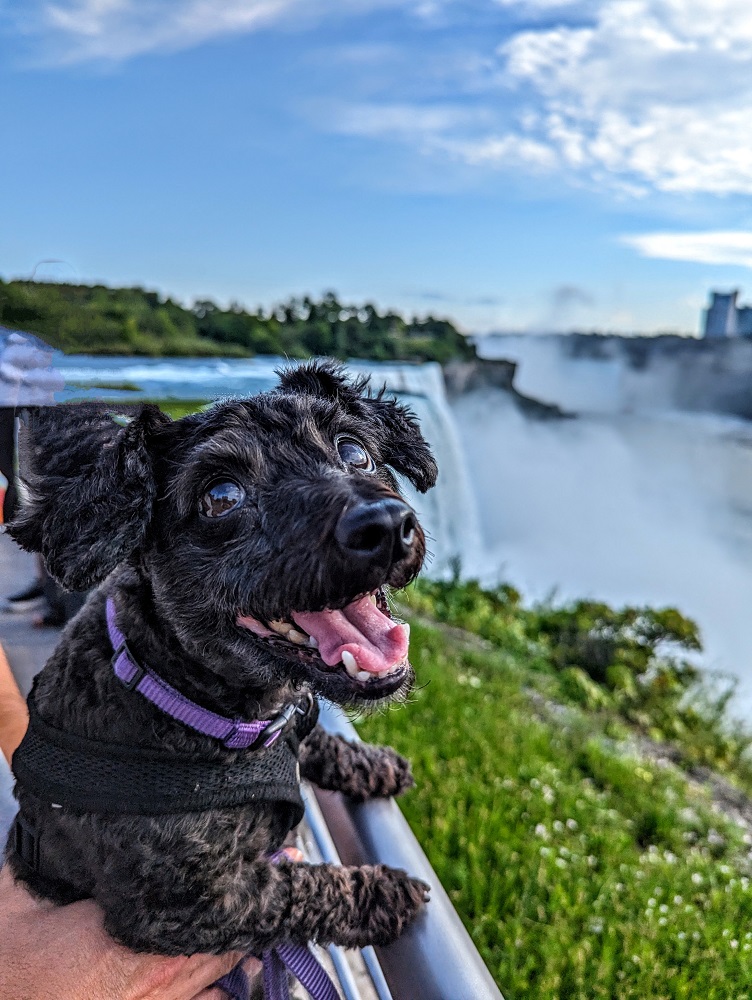
We wanted her to fly in the cabin with us rather than being transported as cargo. For anyone with a large dog, that’s not possible. Thankfully Truffles is only 10-11 lbs, so that’s just the right size for her to be able to fly in the cabin in a carrier.
Things are a little trickier when flying with your dog from the US to the UK though. That’s because other than expensive charter flights (think $10k+), there are zero options for having your dog in the cabin with you when flying across the Atlantic ocean between the two countries.
The reason for that is that the UK is very strict with regards to approved routes for bringing dogs into the country. While that makes things more complicated, the UK government does at least have an extensive section on the gov.uk website that gives clear, detailed instructions regarding rules, approved routes, etc.
However, if you can’t fly from the US to the UK with your pup in the cabin with you, how are you all supposed to get there? By flying into a different European country and then taking a ferry or train.
This post is a detailed guide for how we flew with our dog from the US to the UK. If you want to skip to a particular section, you can click on a link below in the table of contents. Rules for traveling with a dog through Europe and on to the UK are subject to change, so I’d highly recommend checking the relevant government websites for the countries you’ll be flying through and to.
Approved Routes For Bringing Your Dog Into The UK Via Ferry Or Train
The UK government website has a complete list of approved ferry and rail routes for bringing your dog into the UK.
Queen Mary II
Most of those are based in Europe, but there is a US option – traveling on the Queen Mary II from New York to Southampton. Your pup doesn’t travel in your cabin; instead, they stay in kennels but there’s a dog butler who takes care of them and you can visit your dog during the voyage.
Needless to say, that comes at an additional cost on top of your standard fare for the cruise. Perhaps the hardest part of this option will be finding availability. Apparently this is a popular option for people wanting to bring their dogs across the Atlantic, so with sailings only once every couple of months or so and a limited number of kennels, you have to book far in advance.
Other Ferry Options
Other sailing options might therefore be easier. Eligible routings include ports from countries including France, the Netherlands and Spain. The best routing for you will depend on a few factors such as the cost of flying to that country, your ability to get from the airport to the ferry terminal, where you’ll be moving to in the UK, etc.
For example, a couple of the ferry routings from the Netherlands dock in Newcastle and Hull, both of which are in the north of England. Those could therefore be the best option if you’re moving to the north of England or Scotland. Ferries departing from France meanwhile might be better if you’ll be living in the south of England. For example, all those ferries dock in Portsmouth, Dover, Plymouth and Newhaven, all of which are on the south coast.
Eurotunnel Le Shuttle
Another option is taking the Eurotunnel Le Shuttle from Calais to Folkestone. This is a rail service that takes you beneath the English Channel, but it’s not as easy as it might seem.
That’s because it’s different to the Eurostar where you can be a foot passenger. With the Eurotunnel, you have to travel by car. I don’t believe it’s possible to rent a car in France and travel one-way to the UK, so you can’t do that yourself. There are pet taxi services you can book that’ll transport you and your pet by car via Eurotunnel, but we didn’t explore that option extensively due to the cost.
Alternate Option: Ireland
There’s seemingly another option that’s not listed on the UK government’s website. It sounds like you can fly to Ireland (e.g. on Delta Air Lines), then travel across from there to the UK. I didn’t realize this was possible until we’d already made all our plans. I therefore didn’t investigate it too closely, but that has the potential to be another good option. My guess is that you could fly into somewhere like Shannon or Dublin, then travel up to Belfast in Northern Ireland and then take a ferry from there to Liverpool. We took that ferry journey in the opposite direction a few years ago (albeit without Truffles) and enjoyed it, so that’s not a bad option.
It might even be easier than that. The UK government website states “You do not need to use an approved route if you’re travelling within the UK or from Ireland.” It might therefore be that provided you meet Ireland’s (i.e. the EU’s) requirements, you can then fly with your dog in the cabin with you to the UK. I’m far from certain about that though as I haven’t researched it.
Our Chosen Routing: Washington D.C. to Amsterdam to Newcastle
There were a couple of factors that were most important to us personally when deciding on our routing from the US to the UK.
One is that this was going to be Truffles’ first flight and the journey would already be a bit of an upheaval for her. We therefore didn’t want to have to connect in a European airport to another flight after a long transatlantic flight, so Spain was crossed off the list.
That left Amsterdam (Netherlands) and Paris (France). Both cities had plentiful flight options, so that wasn’t an issue. What helped us make our final decision was the ease with which we could get from the airport to whichever ferry terminal we needed to get to.
If flying into Paris, we’d have had to get from there to one of any number of ports, all of which were more than two hours away. We could rent a car and drive to one of them, but then there’d still be the hassle of getting from the rental car drop-off to the ferry terminal.
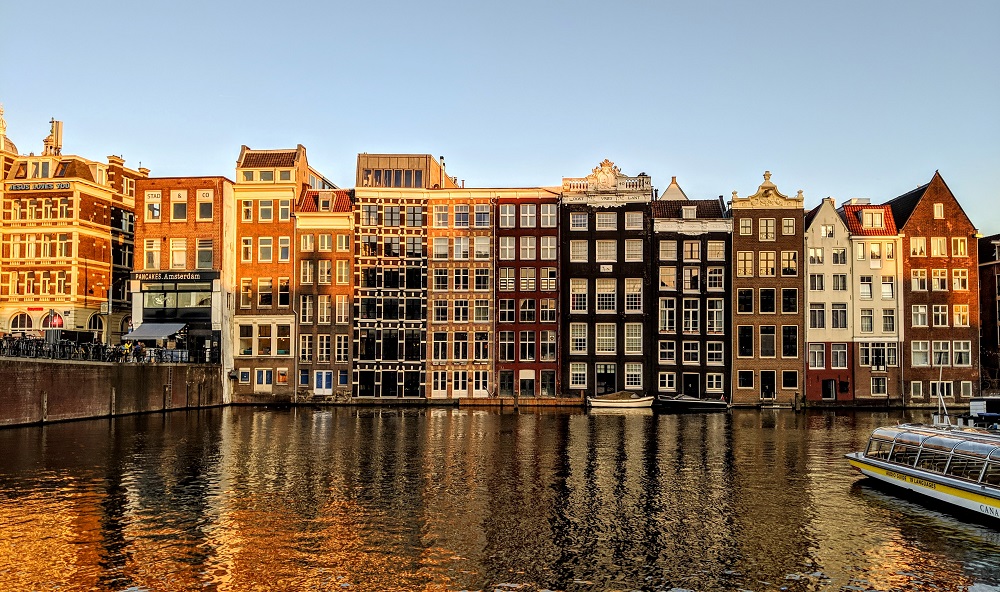
Amsterdam on the other hand was much easier. All three ferry routings from the Netherlands to the UK are less than an hour’s drive from Amsterdam Schiphol airport. The closest of those – Amsterdam (IJmuiden) – is only a 25 minute drive from the airport, so we figured we could get an Uber or taxi from the airport to the ferry.
The ferry from Amsterdam (IJmuiden) docks in Newcastle. That wasn’t our end destination, so we’d need to get a rental car. When researching our options, it looked like our cheapest car rental options would have us picking up a vehicle from Newcastle airport which is also a 25 minute Uber or taxi from the ferry terminal on that end.
If you’ve never been to Amsterdam before, it’s a great city to visit, so it could be worth spending a couple of days there before continuing your journey. However, you’ll need to be careful paperwork-wise due to the timings with which you need to enter the UK for your dog’s health certificates to still be valid.
Deciding on the routing was fairly easy for us, but that still left us with having to arrange all the logistics of the journey. Ultimately, it all went smoothly and we got from the US to the UK with very few hassles travel-wise. However, we did have to delay our travel dates once, plus we had a scare with the vet which we thought would result in us having to delay our journey even longer. Thankfully that issue got resolved, but here’s a breakdown of how we booked everything and all of the paperwork that we had to get done to move our dog to the UK. The sections after that focus on our experiences on the actual travel days.
Booking A Pet-Friendly Flight From Washington D.C. To Amsterdam
Booking Our People Tickets
![]()
I believe both Delta and KLM (and possibly other airlines) allow small dogs in the cabin with you when flying from the US to Amsterdam. We wanted to use miles to pay for our flights to save money, so booking with KLM was our best option.
KLM flies from numerous airports in the US to Amsterdam including New York, Washington D.C., Atlanta, Boston, Chicago, Houston, Los Angeles, San Francisco and more. We’d originally booked our flight to travel the second week of March from New York, but had to cancel that due to delays in getting Truffles’ paperwork sorted out (more about that in a later section).
The cost for that originally booked flight was 18,750 Flying Blue miles + $95.50 in taxes and fees per person. Ordinarily a one-way flight in economy from the US to Amsterdam would cost from 25,000 miles. However, when booking in February, New York was included on the list of Flying Blue Promo Rewards which gave a 25% discount.
We’d loved to have used miles to fly business class, but dogs aren’t allowed in the business class cabin as it’s not possible to put dogs under the seat in front of you.

For comparison, the cost of a one-way ticket including one piece of checked luggage per person in cash would’ve been $294 per person. If you strip out the $95.50 of taxes and fees that are part of that fare too, it means we redeemed 18,750 miles to save $198.50 which means we got 1.06 cents per point of value by using the miles. That’s fair – but not particularly amazing – value. For flights on other dates though, the cash savings could potentially be even more substantial.
As I mentioned earlier, we had to rejig our plans due to an unfortunate delay with the paperwork for Truffles. Canceling our flights meant paying a 70 EUR cancellation fee per person, but it meant we were able to get both the miles and the $191 of taxes/fees refunded.
When it came time to book our new flights, New York wasn’t on the next list of Flying Blue Promo Rewards eligible cities. What was even better was that Washington D.C. ended up being included on that new list. At the time, we’d been staying in the Virginia Beach area which is a ~3 hour drive to D.C. Previously, we’d have had to fly from Norfolk, VA to New York before catching our flight on to Amsterdam. Instead, this time we were able to book a flight from Washington D.C., driving up there the night before and staying at a pet-friendly hotel using Hyatt points. Shae’s mom and stepdad drove us up with all our stuff and so we booked a hotel room using points for them too.
Seeing as the flight from Washington D.C. to Amsterdam was on the new Flying Blue Promo Rewards list, that once again cost us 18,750 miles + $95.50 per person. Note that the cost doesn’t include your dog – that has to be booked and paid for after you have a reservation.
Tip: Get Flying Blue Miles By Transferring Points
We’ve never earned Flying Blue miles from a paid flight. Instead, we transferred American Express Membership Rewards to my Flying Blue account.

The great thing is that Air France/KLM Flying Blue is a partner of all the major transferable currencies in the US:
- Amex Membership Rewards
- Chase Ultimate Rewards
- Citi ThankYou
- Capital One miles
- Bilt Rewards
- Wells Fargo
You can only transfer in increments of 1,000 points at a time for most of these programs. Seeing as the total number of miles we needed was 37,500, I transferred 38,000 Membership Rewards points over. That’s left me with a balance of 500 Flying Blue miles to redeem in the future. If there’s no further activity on my account in the next two years, those 500 miles will expire. I could either extend them by transferring another 1,000+ miles, but I also wouldn’t be distraught if I let those 500 miles lapse.
How To Add A Dog To A KLM Flight Reservation
You can’t add your dog to your reservation when booking your flight initially. However, once you’ve made your reservation you’ll have the option to add them.
To do that, go to manage your booking. There, you should see a section titled ‘Extra Options’.
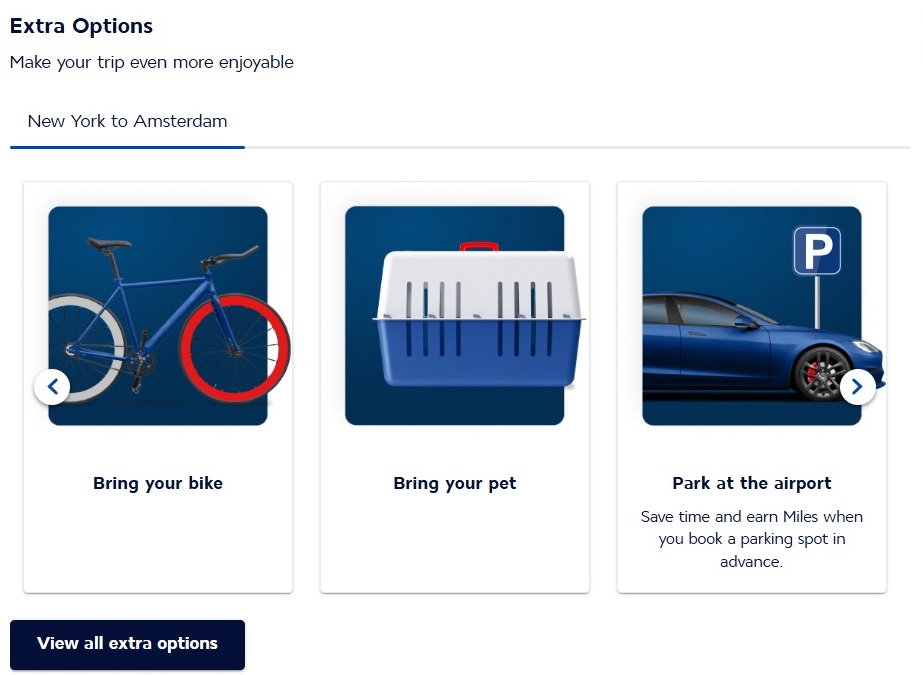
If there’ll be more than one of you traveling, you’ll select which of you to allocate your dog to. You also have to ensure that your dog is added to your reservation at least 48 hours before your flight, so this won’t really work if you’re making an almost literal last minute booking.
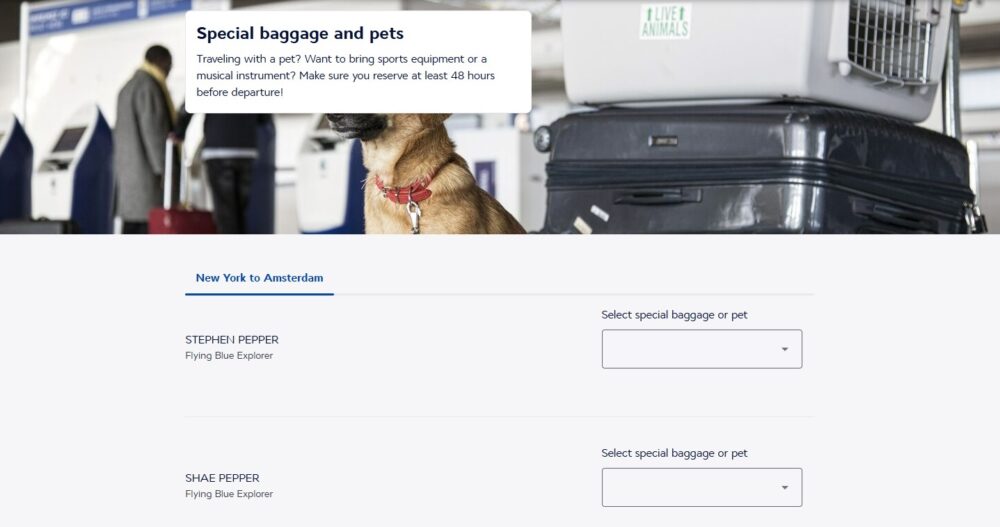
After selecting the person who your pet will be added to, you’ll select whether you’re adding a dog or cat and then it’ll list some important requirements. That includes the dimensions for the pet carrier – I share which one we used in one of the next sections.
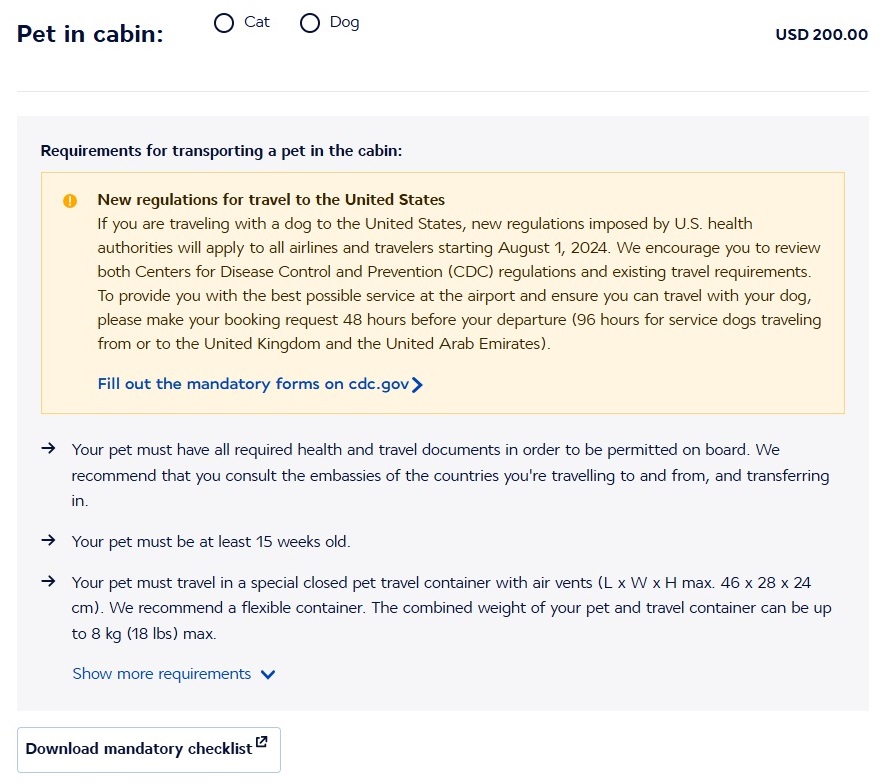
At the bottom of the screenshot above, you’ll see that there’s a button to download a mandatory checklist. This is something that you’re supposed to complete and hand over when checking in for your flight. I’d recommend downloading the checklist directly from KLM yourself in case it changes in the future, but here’s a link to the document that was in force in April 2025.
When flying internationally with KLM, you get both a carry on and a personal item. Something important to be aware of when traveling with your dog is that they’ll count as your carry on, so you’ll only be able to bring a small personal item (such as a handbag, a small backpack, etc.)
The pet fee for our KLM flight from Washington D.C. to Amsterdam was $200. That’s a little more expensive than flying with a dog within the US as that’s normally $100-$150 depending on the airline. However, it was a small price to pay for having Truffles join us in the cabin. To help reduce the cost, I paid with one of our Hilton Aspire credit cards. That comes with a $50 quarterly credit for purchases directly with airlines and pet fees are included in that. That meant our net cost was $150.

When cancelling our original flight from New York to Amsterdam, in addition to getting a refund of our miles and taxes/fees, KLM also refunded that $200 pet fee payment. We therefore had to pay the pet fee again with our new reservation; if you simply change your flight rather than cancel, that’s presumably not necessary as the fee you’ve already paid will be carried across.
Booking A Pet-Friendly Ferry From Amsterdam To Newcastle
Booking Our Original Ticket
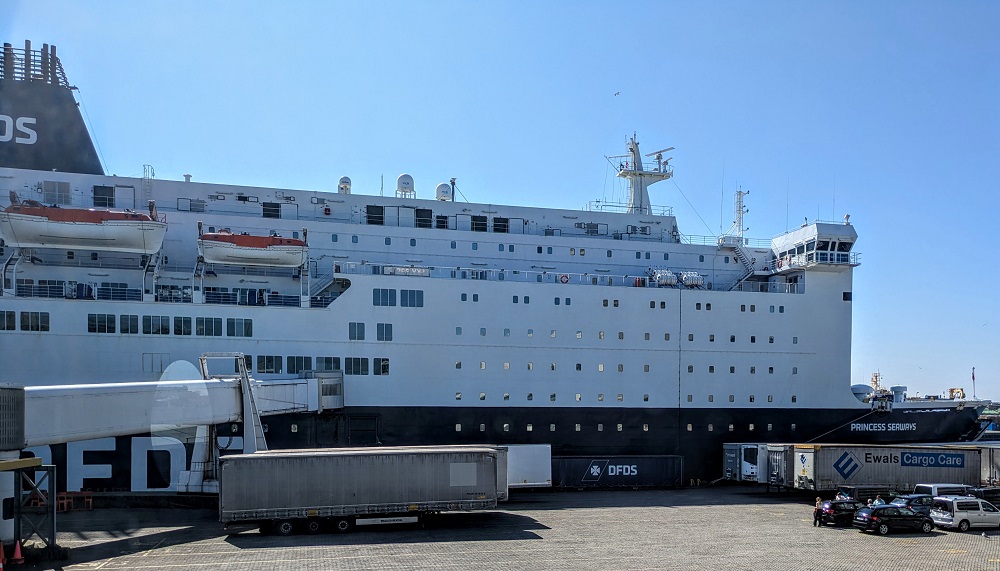
Having booked our flight, it was time to book our ferry to get from Amsterdam to Newcastle. This route is served by DFDS and we booked directly on their website (our affiliate link). It leaves Amsterdam late afternoon/early evening and arrives in Newcastle the next morning.
When booking, something important to bear in mind is that in most cases, flights from the US to Amsterdam will leave in the afternoon/evening and arrive the next morning. You’ll therefore need to ensure that you book a sailing for the correct day (i.e. the day after your flight departs). In the stress of trying to sort everything else out, it could be easy to overlook that.
I’d also highly recommend researching your ferry options before booking your flight. You have to book a pet-friendly cabin or a kennel in order to travel with your dog on this route. There’s a limited number of those and they do sell out, so it would be a shame to book your flight to Amsterdam only to discover that you can’t book a ticket on the ferry. This should be less of a problem when booking several weeks or months in advance, but it could be problematic if booking at the last minute (as we almost discovered later on when we encountered problems with our pup’s paperwork).
The DFDS sailing from Amsterdam (IJmuiden) is on a large ferry that carries both cars and foot passengers. Unless you happen to have someone who can pick you up in their car in the Netherlands, you’ll be booking as a foot passenger like we were. This adds a couple of quirks to the booking process; it’s not anything to worry about, but you will need to be aware of it.
The first quirk is that when you try to book as a foot passenger, it’ll look like you can’t do it online. That’s because after selecting that you’ll be traveling with no vehicle, the option to select that you’ll be traveling with a pet will disappear. Instead, it’ll say ‘Should you wish to travel with a pet please contact our call centre’.
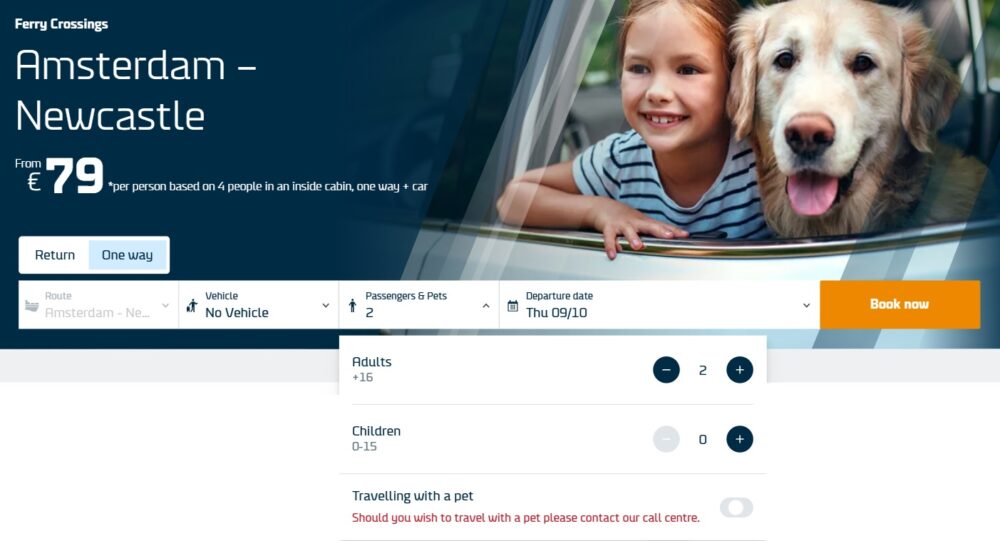
I therefore sent their helpdesk an email to explain that I wanted to book us on as foot passengers, but that I couldn’t then add our dog. They sent a reply advising that I could book online as the message on the website is outdated.
Sure enough, when clicking through from that initial booking screen, it gave me the option to book a pet-friendly cabin despite not having stated that I was traveling with a pet.
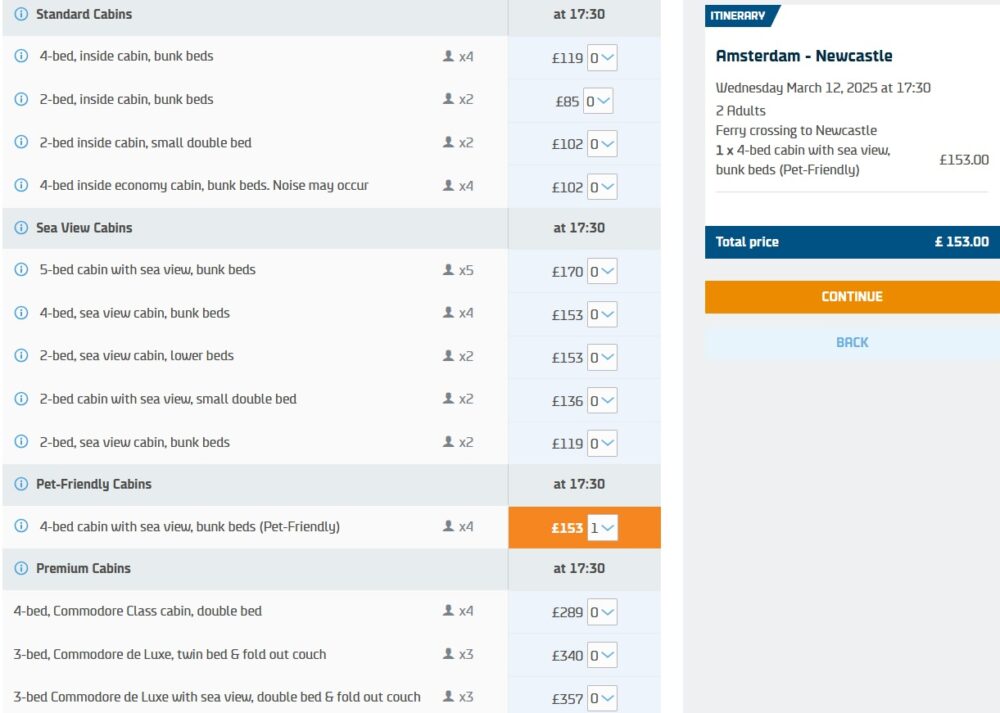
In case you’re wondering, that £153 (~$200) cost covers the entire cost for up to four people in the cabin. You’ll therefore pay that amount regardless of whether you’re traveling solo or if you’re traveling with up to three additional people. That pricing varies depending on your date of travel; sometimes it’s more expensive, other times it might be cheaper.
What it doesn’t include is the pet fee. That’s the other quirk I mentioned earlier. A few days before our eventual sailing, I received an email from DFDS stating that we hadn’t included a pet as part of our booking, but that we’d booked a pet-friendly cabin. If we didn’t have a pet, we’d have to change our cabin; if we did have a pet, we’d have to pay a £30 (~$40) fee. I replied to their email to confirm that we would have our dog with us and they adjusted our booking to add her, sending a separate email with a link to pay the additional fee. To avoid any hassles or problems with your itinerary (e.g. that email from them going to your spam folder without you noticing), I’d recommend calling them after booking your ticket to add your pup(s).
Optional Extras
During the initial booking process, DFDS will offer various optional add-ons. That includes the ability to pre-pay for dinner and/or breakfast. I’d recommend doing that because prebooking online offers a discount on the cost of the meal. With dinner, prebooking also means that you can select a dining time so that you don’t have to wait for a table.
I’m normally a little dubious about booking things like this in advance just in case we change our mind. However, I figured that we’d want dinner and breakfast regardless, so we might as well prepay to save.
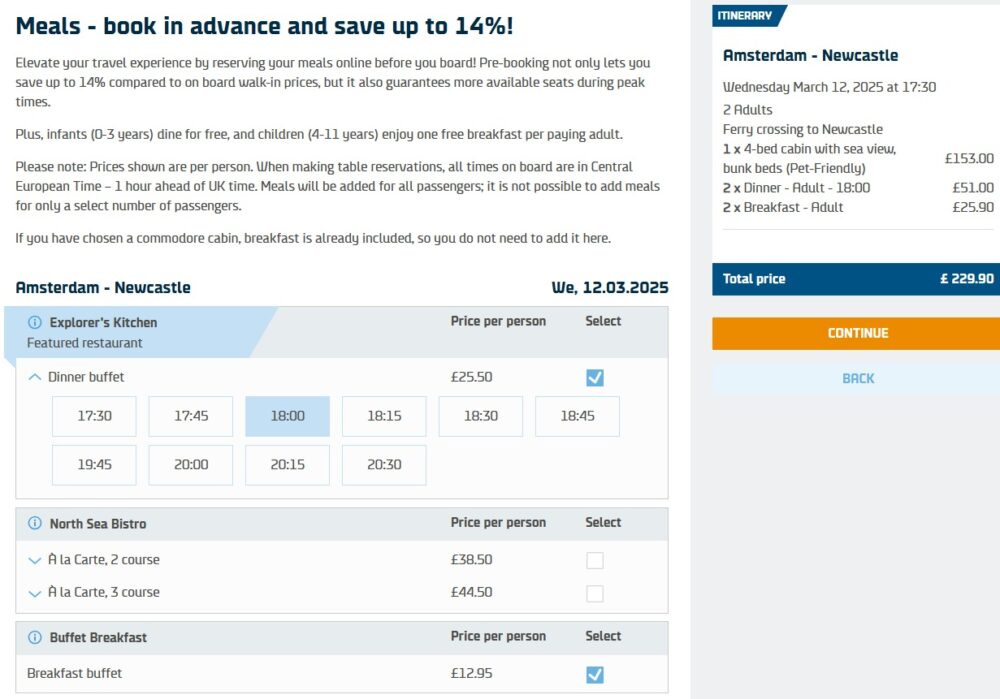
For dinner, we selected the dinner buffet in Explorer’s Kitchen, as well as the breakfast buffet the next morning which is also in Explorer’s Kitchen. As for the dinner timing, I picked 6pm. The ferry departs Amsterdam at 5:30pm, so I thought we could get underway and then eat shortly after. I figured that way, if we hadn’t gotten much sleep on our flight to Amsterdam, we could have dinner and then crash in our cabin.
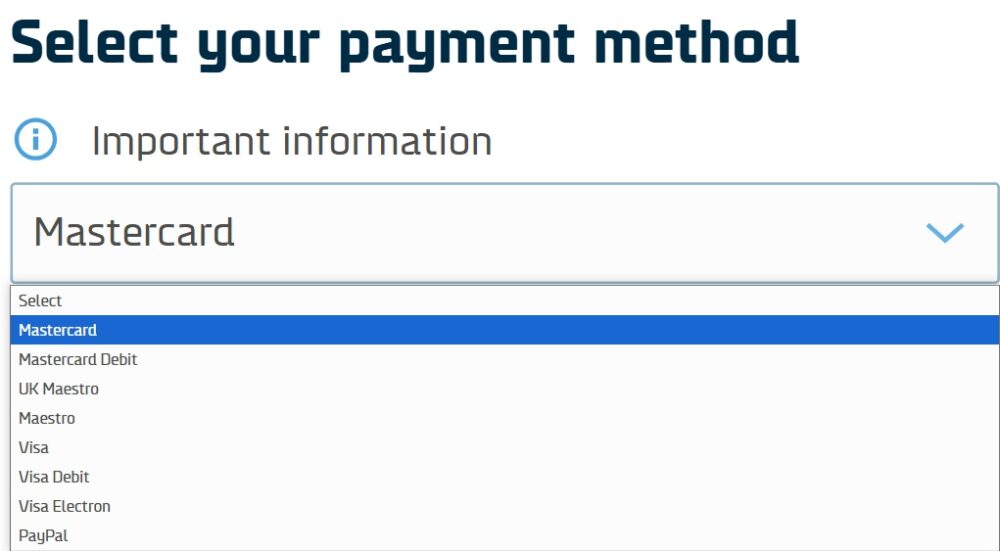
When it comes to payment methods, you can use Visa, Mastercard or PayPal – American Express and Discover weren’t listed as payment options. If you have Amex or Discover cards loaded to your PayPal wallet, it might be possible to use them that way, but I didn’t test it out.
Changing Our Booking Dates
Our original sailing was meant to be on March 12, but we had to postpone our moving dates by several weeks. From what I could tell, our DFDS booking was non-refundable and so I was concerned that we’d lose the money we’d already paid and would have to book another ticket.
Thankfully that wasn’t the case – to an extent. I think it might indeed be the case that you can’t get a refund, but you can make a change to your reservation. I called up and asked if we could change our booking from March 12 to April 4. That wasn’t a problem at all and making that change was quick and easy. The date we changed our sailing to was a little more expensive, so we had to pay the difference over the phone, along with a £20 (~$26.50) change fee. That was absolutely fine with us and we appreciated that we didn’t lose what we’d already paid.
No Pet-Friendly Cabins?
I mentioned earlier that the pet-friendly cabins sometimes sell out. A few days before we were due to move, it was looking like we were going to have to postpone our sailing date for a second time. The problem was that over the course of the week where we might be able to move, only one or two days had pet-friendly cabins available. Those dates that were available were then even more expensive than our originally-booked (and subsequently adjusted) itinerary. Booking as far in advance as you can is therefore preferable because booking last minute could leave you with either zero options or a few expensive options.
The Pet Carrier We Used
KLM’s pet carrier requirements were that dimensions couldn’t exceed 46cm (length) x 28cm (width) x 24cm (height). That’s 18″ x 11″ x 9.5″ for those more familiar with inches as a unit of measurement. The weight of the bag and your dog combined can’t exceed 8 kg (17.6 lbs) either.
Truffles is 10-11 lbs depending on if she’s carrying any holiday weight, so that meant our carrier needed to weigh no more than 6.5-7.5 lbs. Other requirements are that your dog must have enough space to be able to get up, turn around and lie down, that it’s waterproof and that it’s well-ventilated.
During my initial research, I came across this BurgeonNest pet carrier (our affiliate link) and bought it. Reviews for the bag were good and I liked – sort of – that it came on wheels. Having it be on wheels would make it easier to transport Truffles around, but those wheels could present a different problem – Truffles haaaaaaates small wheels. She’s fine with small wheels on suitcases (thankfully, seeing as we’d been on a 7 year, 50 state road trip up to this point), but she freaks out at small wheels on skateboards, scooters, etc., particularly the sound of them. Putting her on a device that had those wheels was therefore going to be a little risky.
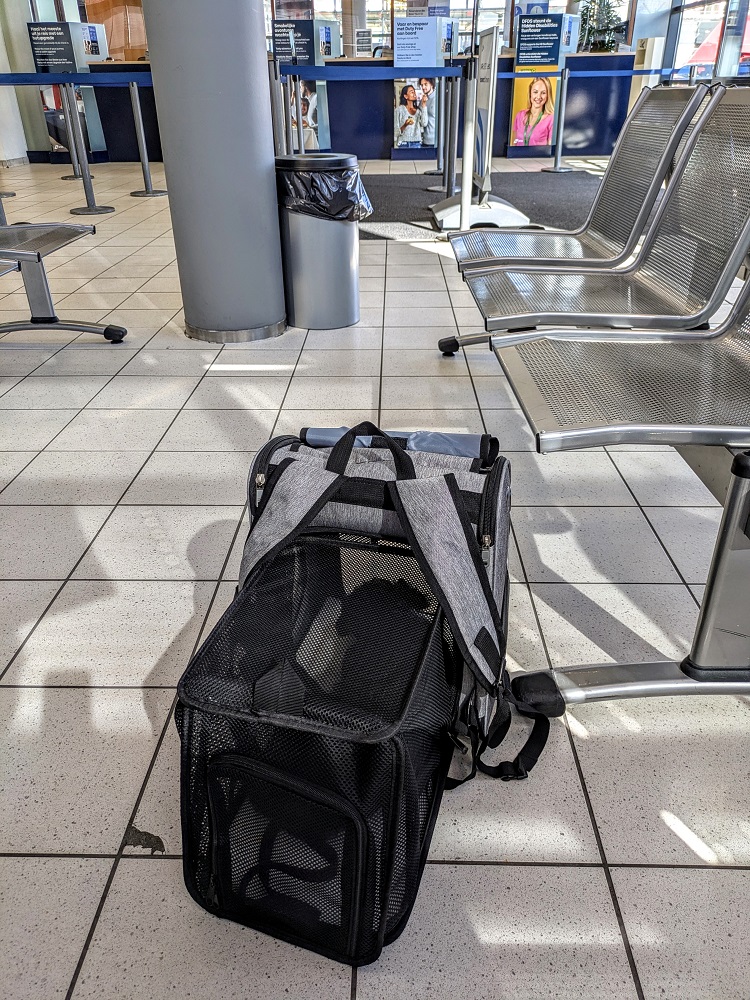
Despite having bought that carrier, I came across a different one on Amazon that looked like it would be even more perfect for our needs. It was this COVONO expandable pet carrier (our affiliate link).
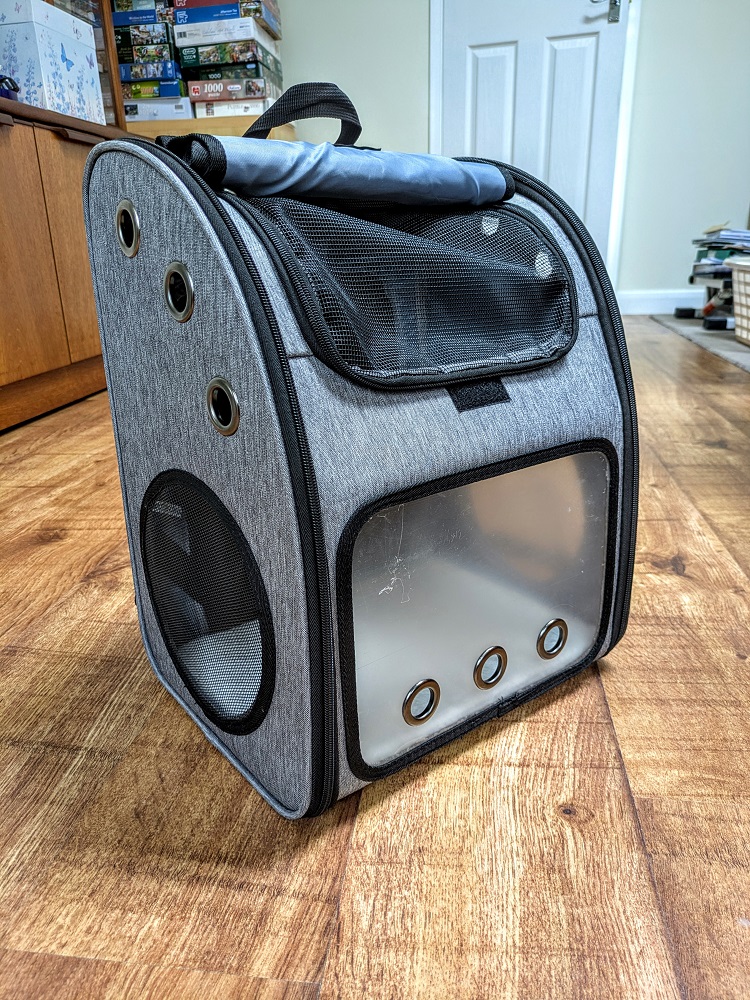
Rather than it having wheels, it had straps to carry as a backpack. We liked that idea because it would free up one of our hands to make it easier to maneuver the rest of our suitcases around. A few other features that we liked about it were:
- There are lots of ventilation holes and netting areas, so she’d get plenty of air
- You can put your dog in on either side as they’re both zipped, as well as through a zipped hole at the top
- It flattens down easily to not take up much space
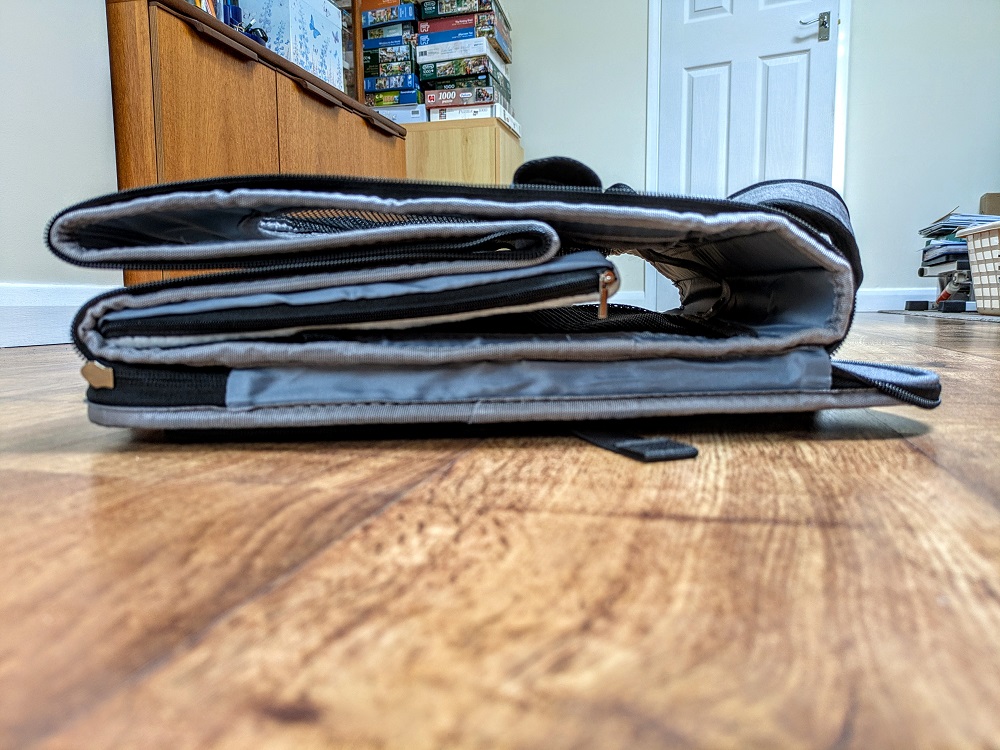
Another feature that sold it for us is that it’s expandable. By unzipping a section at the back, you can fold out a netted area to provide your pup with even more space to lay down in.
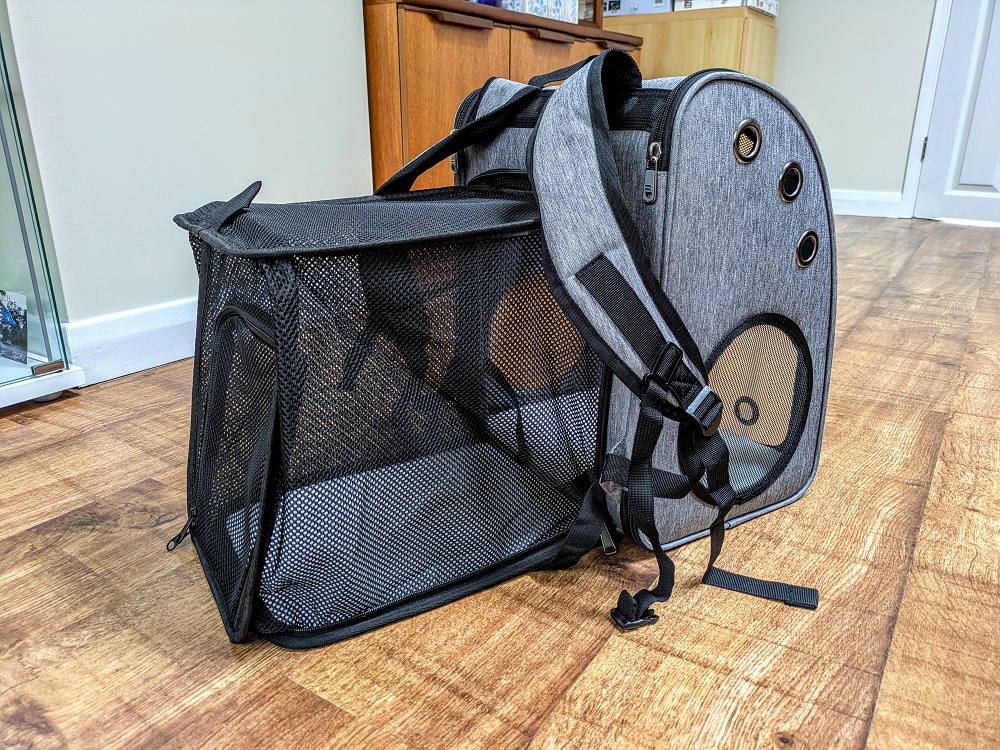
At 16.5″ x 13.4″ x 10.2″, it was a little risky because a couple of those dimensions were ever-so-slightly larger than the dimensions listed by KLM. However, we decided to go ahead and buy it, while also bringing the other carrier with us to the airport. If they accepted this new COVONO carrier, we’d leave the wheeled one behind. If they wouldn’t accept this backpack pet carrier but were fine with the wheeled one, we could flatten down the backpack and put it in a suitcase for future use.
I’ll share more about it later on in the flight section, but the backpack carrier ended up being absolutely fine size-wise. It was nice and sturdy, plus Truffles had plenty of space in it – it was even more comfortable for her than we’d hoped. The carrier ended up being a superb buy and so I’d highly recommend it – you can get it here (our affiliate link).
Getting Pet Documents From The Vet For Entry Into The EU & UK
Perhaps the biggest potential for stress when moving your dog from the US to the UK is dealing with their paperwork. Because you have to route via a European country like France or the Netherlands, you have to ensure you have paperwork for both the EU and the UK. Both regions have their own requirements, so it’s vital that you fulfill both sets.
I was in charge of logistics for getting us to the UK, while thankfully Shae took up the mantle for dealing with the vet side of things. This ended up being a bit of a mess, but not due to Shae. One aspect was simply an unfortunate timeline of things when we first got Truffles, while the other was the fault of the vet we used.
Our Unique Problem
The initial problem that caused our delay was Truffles’ rabies vaccinations and – more pertinently – the records of them. We got Truffles in 2013 when she was three months old. We got her a rabies vaccination, but didn’t have her microchipped until the following year. A few years later, our vet couldn’t find her microchip. That seemed weird as it’s not like it would just fall out, but there wasn’t much we could do and so we got her microchipped again.
After that initial one year vaccination in 2013, she’d gotten three year booster shots and was fully up-to-date. Our problem was that the initial one year vaccination wasn’t listed on her microchip and so only three year ones since then had been. Based on the UK government’s page about rabies vaccinations, the fact that her primary vaccination back in 2013 wasn’t listed on her microchip, it seemed we’d have a problem. We could try bringing her in, but if her three year booster shots weren’t sufficient, she’d have to get a rabies vaccination there and stay in quarantine for at least 21 days. Shae and I would also be on the hook for those costs; I’ve no idea how much they’d be, but I doubt it’d be cheap. Even worse, Truffles would have to deal with quarantine for three weeks which is definitely something we wanted to avoid.
We therefore decided to play it safe. We had the vet give her a one year (i.e. primary) rabies vaccination. For that to take effect for the satisfaction of the UK government, we had to wait 21 days. This was only a week or so before we were due to travel, so that was clearly out of the picture. That’s why we ended up having to postpone our move and rebook our flight and ferry journeys.
I imagine for many people this won’t be a problem, but your dog’s rabies vaccination records do need to have been recorded on their microchip and so they need to have taken place on the day of or after the microchip being implanted.
EU Requirements
You can find the EU requirements here. It’s best to check that page in case requirements change, but this is what they were in April 2025. You pet needs to have:
- Been micro-chipped (in line with the technical requirements of Annex II of the EU Regulation on the movement of pets) or has a clearly readable tattoo if applied before 3 July 2011
- Been vaccinated against rabies
- Undergone a rabies antibody titration test, when travelling from a non-EU country (use the tool below to check if this is a requirement for the non-EU country you are travelling from)
- Had treatment against the tapeworm Echinococcus multilocularis, where your destination area is free from this tapeworm (Finland, Ireland, Malta, Norway and Northern Ireland)
- A valid European pet passport, when travelling from an EU country or Northern Ireland to another EU country or Northern Ireland or an EU animal health certificate, when travelling from a non-EU country.
If you’re moving from the US, you therefore don’t need an EU pet passport, but do need an EU animal health certificate. That certificate has the following requirements (my bolding):
An EU animal health certificate is another type of identification document, which contains specific information about your pet (identity, health, rabies vaccinations), and is necessary for travel to the EU from a country or territory outside the EU. It is also based on an EU standard model.
If you are travelling from a non-EU country or territory, your pet must have an EU animal health certificate issued by an official State vet in the country of departure not more than 10 days before your pet arrives in the EU. The certificate is valid for travel between EU countries for 4 months from this date or until the anti-rabies vaccination expires, whichever lapses first.
In addition, you should also complete and attach a written declaration to your pet’s EU animal health certificate stating that its relocation is for non-commercial reasons. This declaration is also required if your pet is travelling under the responsibility of a person authorised by you. In this case, your journey must be within 5 days of the pet’s/authorised person’s journey.
UK Requirements
While the UK’s requirement’s might seem daunting at first glance, they’re set out online clearly, with sections dedicated to each requirement:
- Route – Check your route is approved for pet travel. You do not need to use an approved route if you’re travelling within the UK or from Ireland. There are more approved routes for people travelling with guide or assistance dogs.
- Microchip – Microchip your pet. They must be microchipped before they get their rabies vaccination.
- Rabies vaccination – Vaccinate your pet against rabies. You must wait at least 21 days after the primary vaccination (or the last of the primary course of vaccinations) before bringing your pet to Great Britain.
- Pet travel document – Get a pet travel document from your vet. The type of document you need will depend on the country you’re travelling from.
- Tapeworm treatment – If you have a dog, you may need a vet to give them tapeworm treatment. Your dog must be treated no less than 24 hours before (and no more than 5 days before) you arrive in Great Britain.
- Declaration – You also need to fill in a declaration if you’re not going to sell or transfer the ownership of your pet.
The timing of things is one of the most important aspects of this:
- Rabies – The rabies vaccination needs to happen at least 21 days before you arrive.
- Health certificate – You have to enter within 10 days of the Great Britain pet health certificate being issued
- Tapeworm – The tapeworm treatment must have been given no less than 24 hours and no more than 120 hours (5 days) before you enter Great Britain.
The health certificate and tapeworm treatment are therefore the two areas that have the biggest potential for stress timing-wise. You’ll have all kinds of other balls that you’ll be juggling when moving overseas, so making sure that you travel within 10 days of getting the health certificate and within 1-5 days of getting the tapeworm treatment are vital factors to account for.
Visiting The Vet To Get The EU & UK Animal Health Certificates
Seeing as Shae took care of this side of things, here’s her account of how it went with getting the documents we needed from the vet.
My account in one word.
Ugh.
Firstly, you need to make sure that the vet you’re choosing to use not only issues health certificates, but you MUST CONFIRM that they do INTERNATIONAL health certificates. Several vets I called only did health certificates for within the United States.
I booked in with one local vet in Virginia Beach, and they seemed to really know their stuff. However, they couldn’t get Truffles in as quickly as the second vet I spoke to. That vet seemed to have some idea about the health certificates too, so I cancelled with the first vet and booked with the second. I wish I’d stayed with the first – in the end, the second vet did help us get our certificates, but not without a lot of unnecessary stress.
Vet Visit #1 – February 27, 2025
I had to bring Truffles in to review the paperwork and timeline with the vet. I did this on Thursday, February 27, 2025 with a view to us leaving on March 11, 2025. I’d called to book it the week before, but since the USDA-approved vets were only available on certain days and times, it pushed our first visit very close to our first deadline of March 11th. I went in, provided all the records I could get from Truffles’ home vet (the one she’s gone to since 2014) and all our records from the last seven years of full time travel around the US.
The vet came in and reviewed my dates and her information. He had concerns about the rabies 1-year vaccination not being on the microchip. He said the 3-year booster she’d had in Alaska last year (which they recommended since the rules for reentry into the contiguous US (lower 48) were changing as of August 1, 2024. Although we planned to be back by the last week of July, we went ahead and got it just in case we were delayed for any reason) might be enough since it was within a year of the 3-year booster before that. However, he said they may not accept it – and she might have to go into quarantine – so he recommended that we give her another “official” 1-year rabies vaccine on her microchip to ensure it was correct and wait the 21 days for it to fall within the UK-required approval period for her health certificate.
I said that I needed to check with Stephen, as this would require us to move our flights and ferry. We decided that avoiding quarantine at all costs was the priority, so I called and booked to come back in on the following Monday with a different, but still USDA-certified vet, and get her rabies vaccine.
Vet Visit #2 – March 3, 2025
By the time I arrived at the vet after the weekend on March 3, 2025, we’d rebooked our flight for April 3 and ferry for April 4. I had all our dates, information, and we’d spent three hours ourselves reviewing the rabies information to ensure that we were reading it correctly. Based on our understanding of all the rules, she did indeed need a 1-year rabies vaccine, not a 3-year booster, on her microchip (we also confirmed all her microchip information since she had two different microchips, but that’s a story for another day).
I therefore approved the vaccine, but it turned out it was another 3-year vaccine. They are the same, but on the certificate they stipulate that it expires in a year for the purposes of the UK health certificate, but that back in the US she’d be treated as if it were a 3-year booster. This was a very frustrating situation because we couldn’t be sure if this vaccine would still count, but they assured us it would.
During this vet visit, I went over the timeline in detail with their staff member AND the vet himself. He seemed knowledgeable but distracted, but as it had all been written down, and reviewed with him and his staff member, I went to the front desk to confirm all our dates. That day, March 3rd, they would take down all the information and start the health certificates at the appropriate times to make sure they were returned in time for our April 4th departure. I confirmed with them that 10 days before our leaving date was March 27th, and I booked her required tapeworm treatment for Wednesday, April 2nd, so it fell within the 24-120 hour window for arrival in the UK.
I left it to the “professionals” and went on with our other plans.
I called on Monday, March 24, 2025, to confirm that our certificate was being worked on since our 10-day before leaving date was coming up on Thursday, March 27th. I was told by reception they’d pass on my information to the vet and give me a call if there were any issues. I never heard back.
I called on Monday, March 31, 2025 to confirm that they’d received her health certificates back since a) the UK requires a “wet” signature, not a digital one, so it would need to be counter-signed by the vet before we left within that 10-day window and b) we were leaving on Thursday and hadn’t had any word from the USDA or the vet about her certificates. This is where the puppy poop hit the fan.
I was told on the phone that the upcoming appointment on Wednesday, April 2, 2025 (that I booked as her tapeworm treatment appointment) was her “start her health certificate” visit. I was PISSED. What did they mean they hadn’t started her certificates!? Why had my appointment reason been changed from what I booked when I confirmed with a vet, a staff member, and reception on March 3rd, what it was for and was very clear on all our dates – and knew they were since the vet had also written them down on her records under the notes from the staff member that had taken them and underlined those dates twice. I was told we could come in that afternoon to see what could be done about getting our health certificates completed in time. They didn’t have any answers, but said the Practice Manager was looking into it.
Vet Visit #3 – March 31, 2025
To say I was still enraged a few hours later when I turned up at the vet is an understatement, so I’d asked my emotional support husband to attend with me so he could help keep me in check. When we arrived with Truffles, I went to the front desk and requested that the Practice Manager be present in the room with the vet, since apparently he and his staff couldn’t be trusted with important information and details. She obliged, which I appreciated. I went through all the information with her again and shared my disappointment with the vet and his record-keeping. She went on to intimate that he was STILL, as of Monday, March 31st, trying to say we didn’t need to come in to start the paperwork until later that week, when we were scheduled to depart by car at noon on Wednesday, April 2nd.
In the end, the Practice Manager felt confident they could get the health certificates completed and returned in time. This meant utilizing the overnight feature (for an additional $80) offered by the USDA, since it had to be mailed back to the vet – not just loaded electronically – for the UK health certificate. We might’ve needed to leave on Thursday morning if it didn’t arrive by 5pm on Wednesday, April 2nd, but we could still make our 5:30pm flight from Dulles (the Washington D.C. area was three hours north) as long as it was received by 10:30am on Thursday, April 3rd.
Truffles’ tapeworm treatment was within the 24-120 hour window for her arrival into the UK (when taking into account the time difference), so we were able to get that done at the same time as our impromptu appointment on the Monday. A note for pet owners – Truffles is usually pretty stalwart about vaccinations (especially since she gets them so often these days *insert eye roll here*), but she cried when the tapeworm treatment was administered and cried and limped around a little, hiding under the table after it was over. It’s definitely the saddest she’s been for a vaccine or treatment in a long time (the other two being when she was spayed at a few months old and when we thought her shoulder had been dislocated last summer), so be prepared for some discomfort for your pet. We left with a sad dog and a promise of being notified as soon as the document arrived at the vet.
On Wednesday morning, I received a call from the Practice Manager that the paperwork had been completed and was due to be delivered by 10:30am. I received another call at 10am that the documents had been received. We scheduled to stop by and pick them up a little later that day (we had to get one other routine thing done for Truffles’ personal care that I’d forgotten all about on Monday because of the stress) and so, at 3pm, Wednesday, April 2, 2025, we had them in hand. Truffles’ other issue was sorted out and by 4pm we were on our way to our hotel near Dulles Airport for the night.
In the end, we were able to make it all happen in time but the unnecessary stress added to the process really took a toll on our already stretched mental health.
Flying With A Dog Out Of Washington Dulles Airport
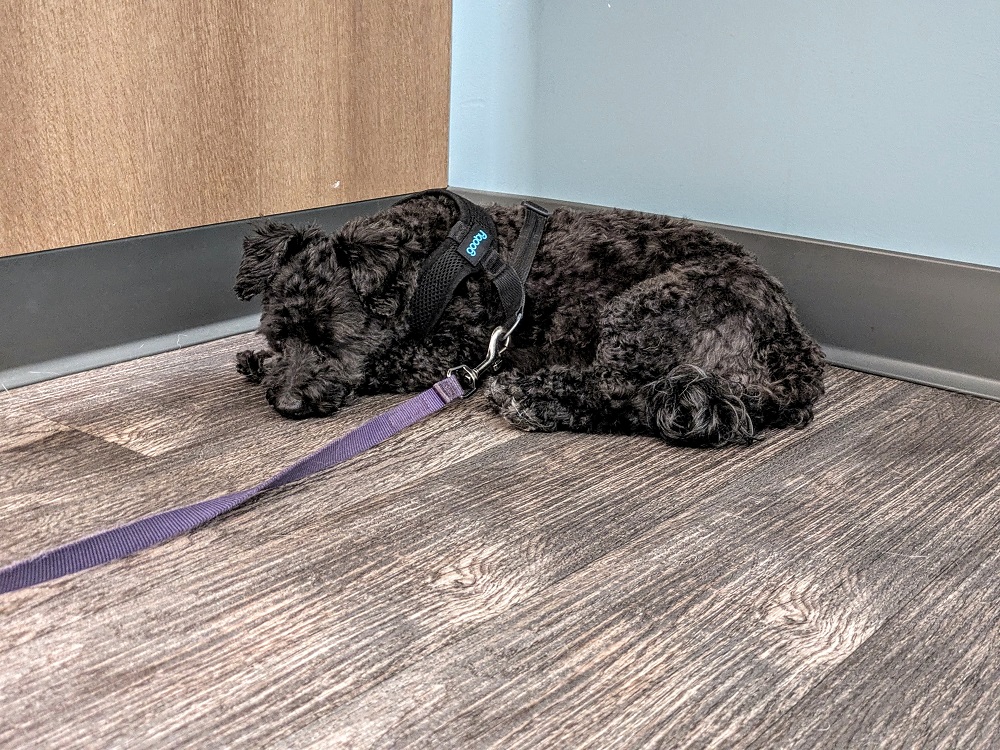
With the necessary documents for Truffles finally in hand from the vet, we drove up to Sterling, VA that night. We stayed at the pet-friendly Hyatt House Sterling/Dulles Airport-North overnight, then utilized the hotel’s free shuttle to Dulles airport the next day.
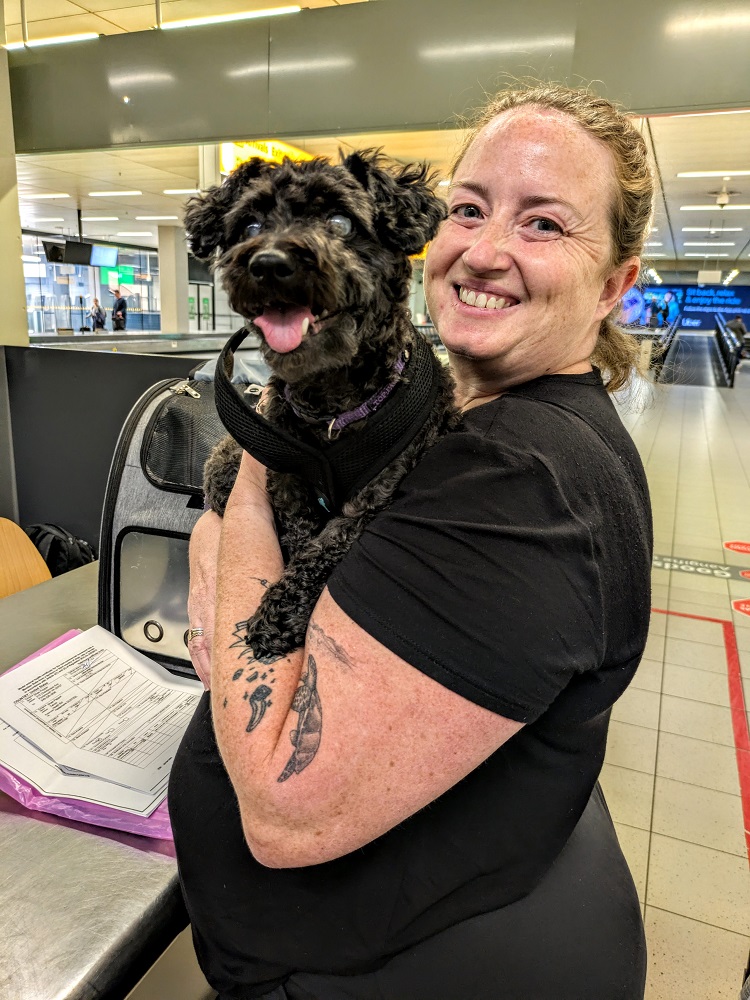
KLM recommends getting to the airport three hours before your flight if traveling with a dog, so that’s what we did. The process was nice and straightforward. They checked the paperwork and weighed Truffles inside the carrier.
The KLM agents were fine with the COVONO expandable carrier, so we no longer had any need for the additional carrier we’d brought along (the one with wheels). Shae spotted someone in the general check-in area who looked like they were dropping someone off rather than traveling themselves. Shae asked if she’d be willing to donate the carrier to a local animal shelter or thrift store and she agreed. However, a different person nearby overheard this and we got chatting to them. It turned out that she was due to be flying with her own dog soon and didn’t have a carrier, so we gave it to her instead.
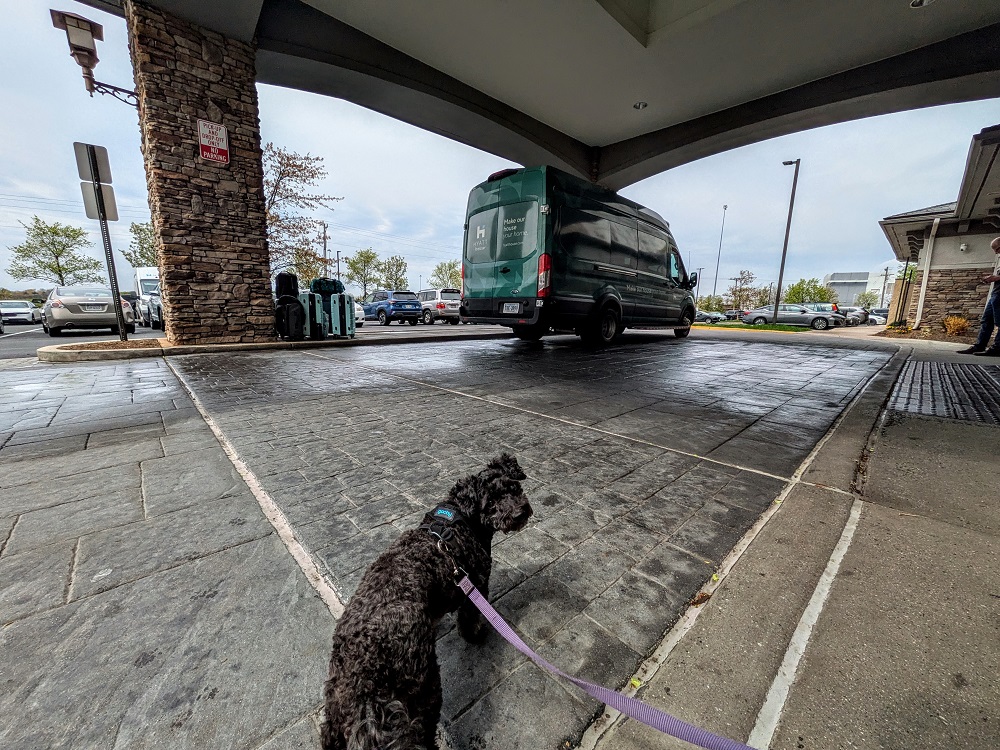
After checking in at the KLM desk in terminal B, we took Truffles outside to use the bathroom. At terminal B before going through security, if you head back outside and walk down to the right, there’s a small enclosed dog park. That pet relief area has artificial grass and a fire hydrant to encourage your dog to go to the bathroom before your flight.
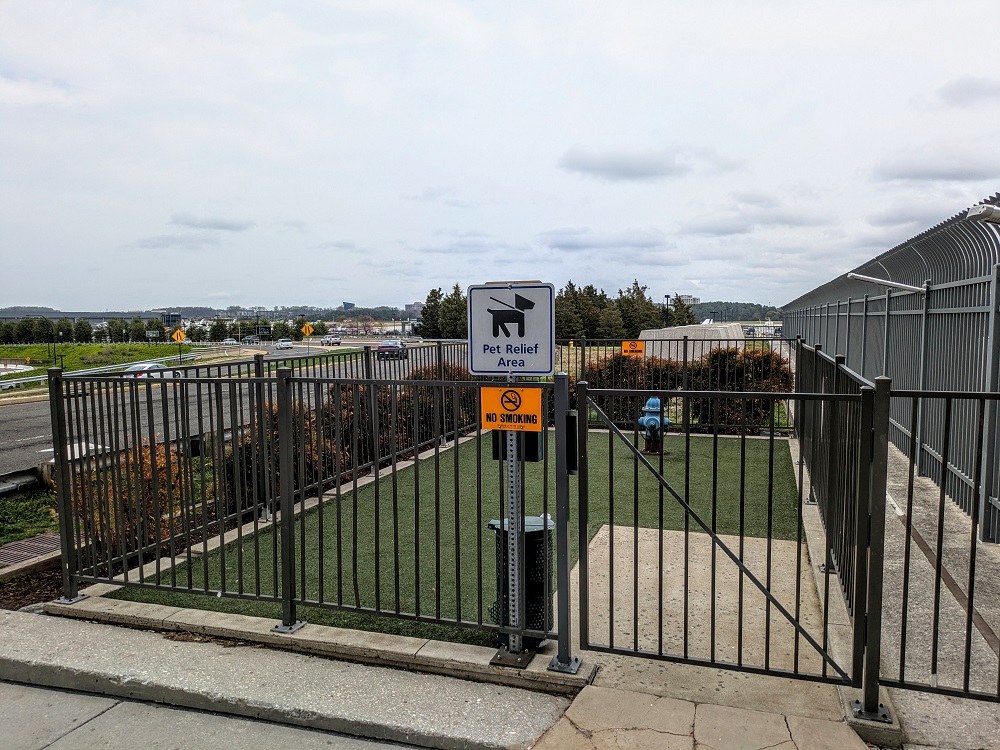
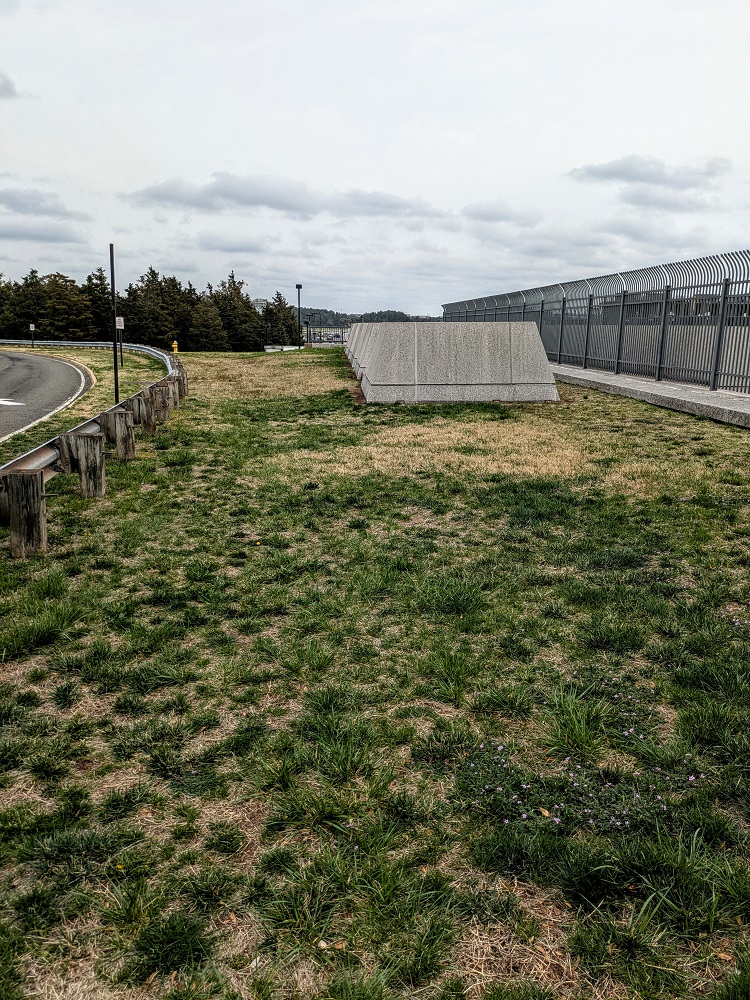
Truffles was happy to pee in there, but she didn’t need to poop yet. To try to encourage her to do both, I took her out of the pet relief area and walked her along the grassy area to the side of the pet relief area, but no luck.
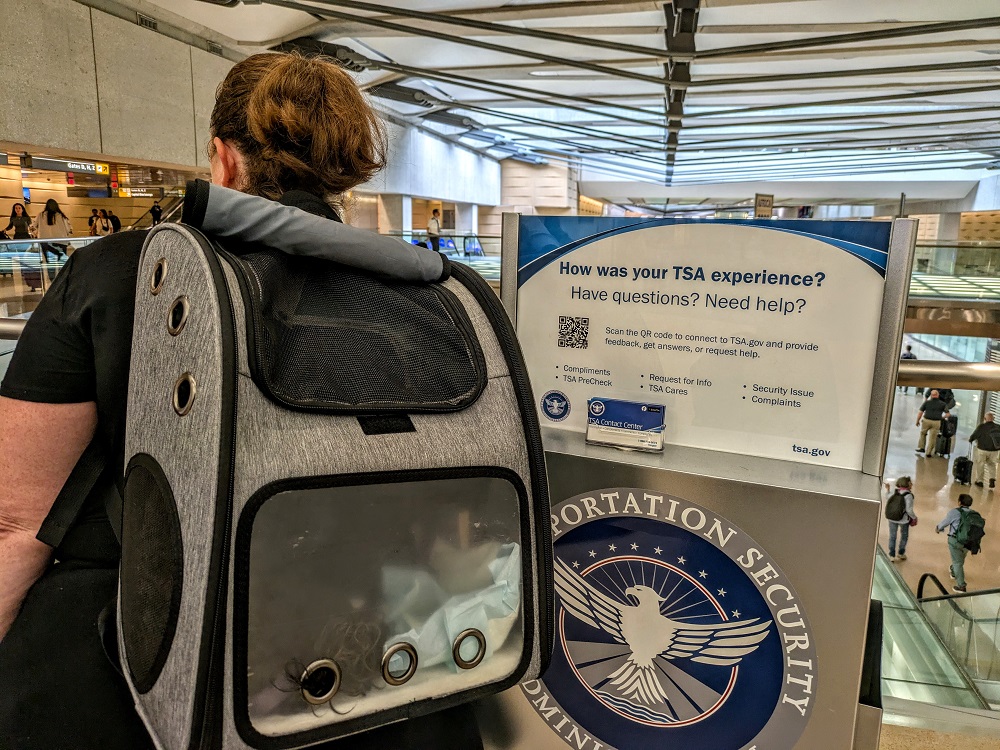
After wandering around there for a little while, we decided to head through security. Shae and I have both CLEAR and TSA PreCheck, so we entered in that expedited area. Although photos are allowed in the security area, we didn’t take any at the time as we didn’t want to hold up the line.
To get to security, we popped Truffles in her carrier. However, at security you have to take your dog out of any carrier they’re in as the carrier has to go through the x-ray machine. Your dog does walk through the metal detectors with you though.
When Shae walked through with Truffles, the metal detector went off. The TSA agent had both of them back up, then they had Truffles walk through without Shae (the agent took the leash momentarily) and then Shae walked through. The metal detector appeared to have been set off by Truffles’ leash, so that was fine – they could tell there weren’t any concealed weapons on her or anything like that.
We put Truffles back in her backpack as soon as we were through security. That was because it was initially so busy rather than her having to be in there. Once we were out into the terminal, we let her stretch her legs in the hopes that it would move other things along.
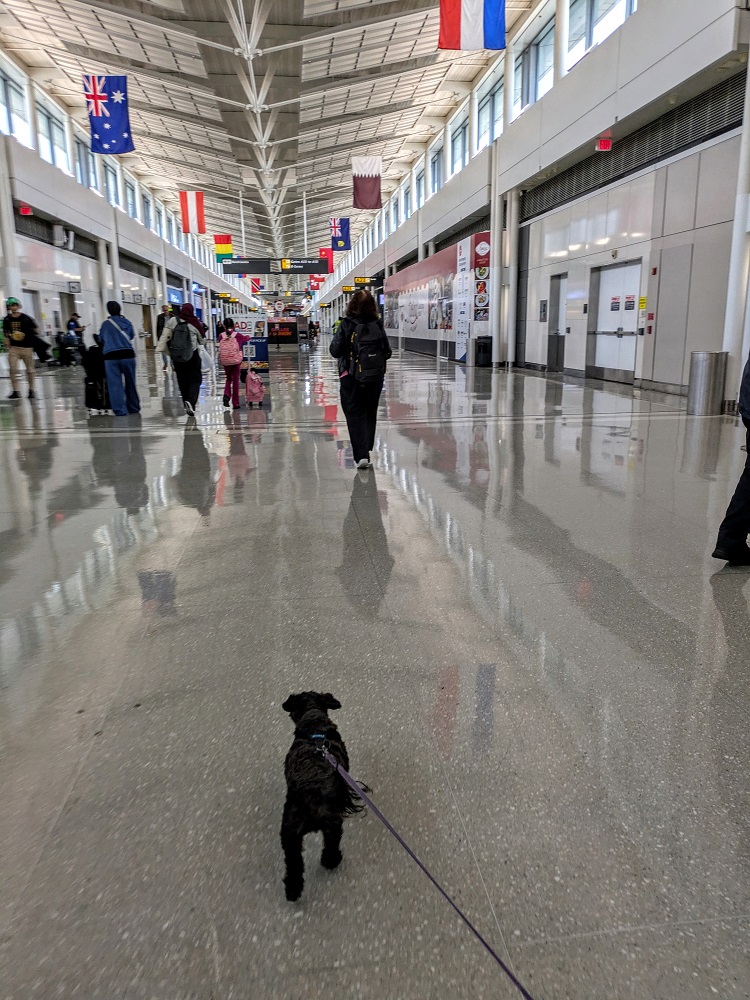
In addition to the enclosed pet relief area outside of Dulles Terminal B landside, there’s a pet relief area airside in Terminal B. That’s next to the Virgin Atlantic lounge and a Brookstone store, near gate A32.
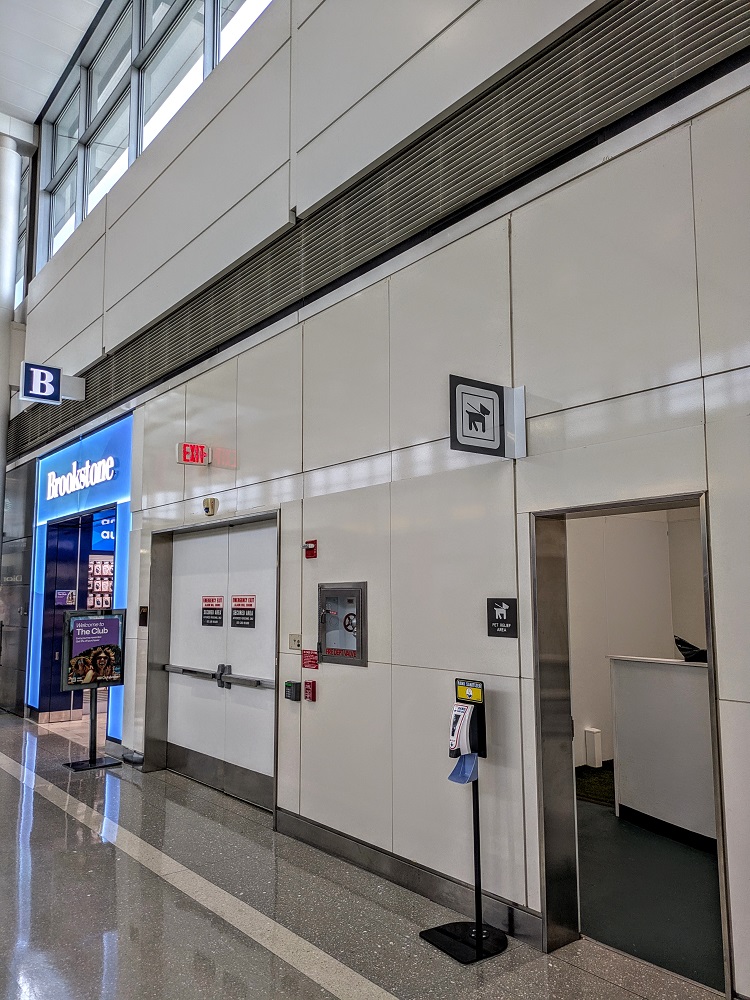
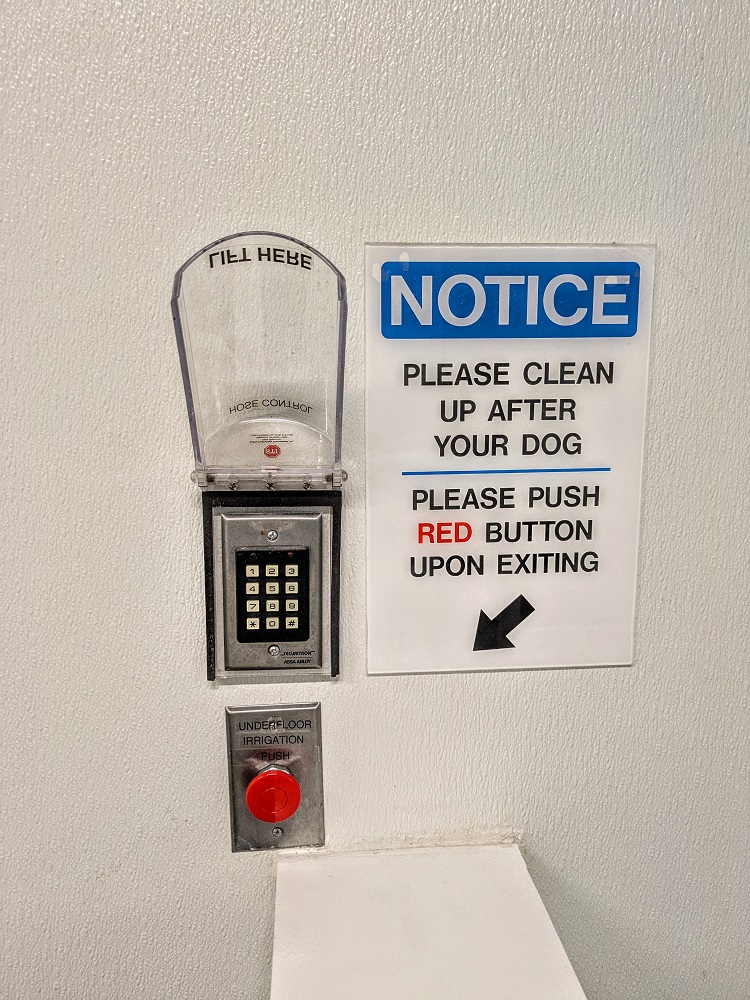
This area had a decent-sized patch of artificial grass, complete with a fire hydrant to help with performance anxiety and a roll of poop bags. Truffles was (somewhat) happy to pee here, but we had no need for poop bags.

When leaving that area, you press a red button which initiates a self-cleaning process for the artificial grass. It seems to push up some kind of strong-smelling cleaning solution to disinfect the pet area. That’s great as it helps prevent it from becoming gross, but it did mean that the artificial grass was already damp from its previous use and smelled like chemicals. I suspect that’s why Truffles was keen on peeing very quickly and getting out of there.
We had some time to kill before our flight, so we tried to access a couple of Priority Pass lounges. However, one of them didn’t accept dogs and the other one which did seem to accept dogs wasn’t actually accepting Priority Pass members that afternoon due to how busy it was.
The three of us therefore stopped by one of the regular fast food restaurants in the terminal and grabbed a bite to eat before our flight. Although we didn’t want Truffles to eat a lot right before our flight, we also didn’t want her to be hungry seeing as she wouldn’t have a chance to eat for another ~12 hours and she hadn’t eaten much that day already. It seemed like the airport was a little too much stimulation for her though, so she didn’t eat anything other than a little bit of our own chicken that we gave her.
After another quick stop by the pet relief area, we headed to our gate.
Flying With A Dog From The US To Amsterdam On KLM

When picking our seats during the initial booking process, I’d selected seats at the back of the plane. While we knew that would mean it’d take us a little longer to get off the plane in Amsterdam, we figured it might be best to be out of the way. It also meant that we could book a window and aisle seat with no middle seat, ensuring we wouldn’t have to worry about a third person to one side of us.
What was handy was that I’d gotten targeted for complimentary Silver status with Delta a few months beforehand. KLM and Delta are both part of the SkyTeam alliance and so they offer reciprocal benefits, one of which is priority boarding for those with status. Despite being seated at the back, we were able to board nice and early which meant we could quickly get all the way to the back of the plane and settled in.
Truffles’ carrier fit perfectly under the seat in front of us. However, be aware that if you’re tall, this leaves you with even less leg room in economy than you normally have.

Another benefit of booking our seats at the back of the plane is that that’s where lots of empty seats ended up being, despite the front half of the plane being pretty much full up. That meant that I was able to move to the row of two seats in front to have all to myself, leaving Shae in the two seats behind. That made it much more comfortable for both of us, plus it meant there weren’t any problems with leg space due to Truffles being underneath one of the seats.
The flight was entirely uneventful. I’d been concerned that Truffles would be upset about being stuck in the carrier all night and would moan about it. Those fears never came to fruition though – she didn’t seem to make a sound. I’m not convinced that she slept on the flight; she doesn’t ever sleep in the car, despite us having been on a nonstop 7 year, 50 state road trip before making this move! Whether she slept or not, she did seem to be comfortable enough in her carrier as she was able to lay down and rest.
Immigration & Customs With A Dog At Amsterdam Airport
Upon arrival in Amsterdam, there’s sadly no pet relief area for your dog immediately. They therefore have to hold on until you’ve gone through immigration, picked up your checked luggage (if applicable) and then made your way through Customs.
At immigration, we mentioned that we had our dog, but they didn’t need to see any paperwork relating to Truffles at that point. After getting through there, we picked up our three checked bags and made our way to Customs. Rather than going through the ‘Nothing to Declare’ section, we went to see the officers to declare Truffles.
This was one of the most nerve-wracking parts of the entire process. We thought we had all our paperwork in order, but this would be where we’d find out if there had been some kind of mistake or misunderstanding made.
Everything was fine! The process took a few minutes longer than it should have because the handheld scanner for them to check Truffles’ microchip was dead, so they had to find a different one. While they looked for that, another of the agents gave Truffles’ paperwork a quick once-over. That was fine and the microchip scan ended up being fine too and we were quickly on our way.
Now that we were through Customs, it was time to find somewhere for Truffles to go potty. We headed through the arrivals hall to the entrance/exit and out the front of the airport. Here, there was a roundabout with a grassy area, so I took Truffles to go there, while Shae stayed with our bags on the other side of the road. Be careful when crossing the road here as lots of buses and taxis zip around.
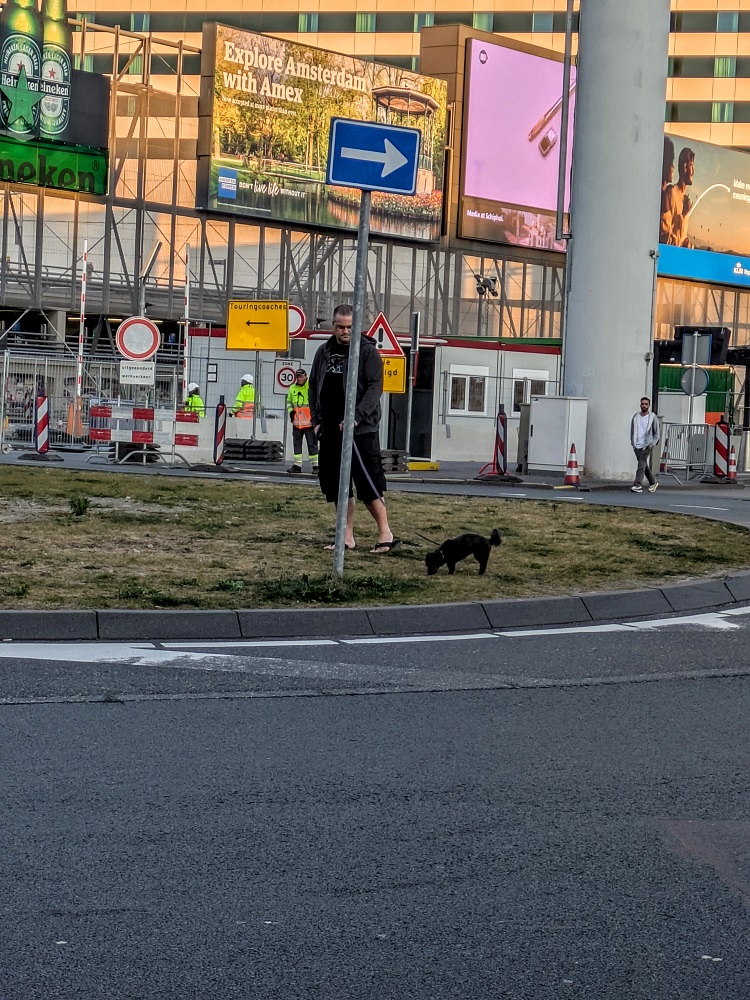
She peed over there several times but still refused to poop, despite it being about 24 hours since she’d last gone. We hung out at the airport for a while and I took her on several walks outside, both to that grassy roundabout and on longer walks. After a couple of hours, she finally went. (n.b. apologies if this is TMI about our dog’s bathroom process, but I wanted to let other dog owners know what to potentially expect.)
We’d gotten through Customs at about 7:30am and our ferry from Amsterdam to Newcastle wasn’t due to depart until 5:30pm. Shae and I therefore figured it would be best to hang out at the airport for much of that time as there were more restaurants, stores, etc. We stopped by a café to grab some breakfast, then found a quieter spot in the arrivals area to sit (there was a restaurant that hadn’t opened for lunch yet, so their seating was empty.)
We put out some food and water for Truffles and she finally had something to eat and drink. After we were all done eating, we moved to what we thought would be a quiet seating area to relax and stay out of the way, minimizing stimulation for Truffles.
That sadly didn’t work out. There was an exit door nearby that was meant to be for emergencies only, but people continually used it to come in and out. That door was very loud, so it disturbed Truffles every time it opened. She also seemed to be a little overwhelmed by all the general hubbub, as well as the low level vibrating of the ground from everyone everywhere moving around. That was one of the reasons I took her on several walks – it just all seemed to be too much for her.
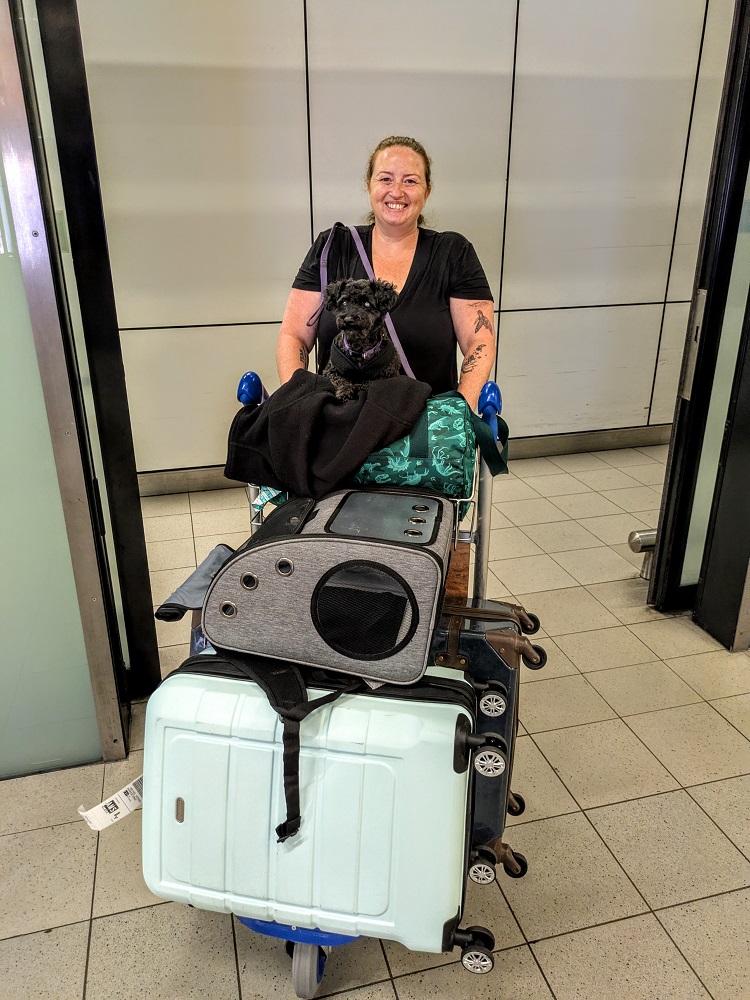
In the end, we decided to head to the ferry terminal early as we assumed it would be much quieter there. We made our way out to the rideshare pickup area, then requested an Uber. Seeing as we had three large suitcases, two carry-ons, a laptop bag and Truffles’ carrier, we requested an Uber XL to ensure there’d be enough space. We also put Truffles back in her carrier for the journey just in case there’d be any issues with having a dog in their vehicle.
DFDS Ferry From Amsterdam (IJmuiden) To Newcastle With A Dog
Heading to the ferry terminal early was a great choice. We arrived at about 11am and were the first foot passengers there; no one else arrived until about 12:30pm.
I took Truffles out a few times to wander around so that she could stretch her legs a bit more before the ferry journey. In the ferry terminal waiting area, we mostly had her hang out in her carrier. We expanded the carrier so that there was even more space inside and she seemed perfectly content with stretching out in there.
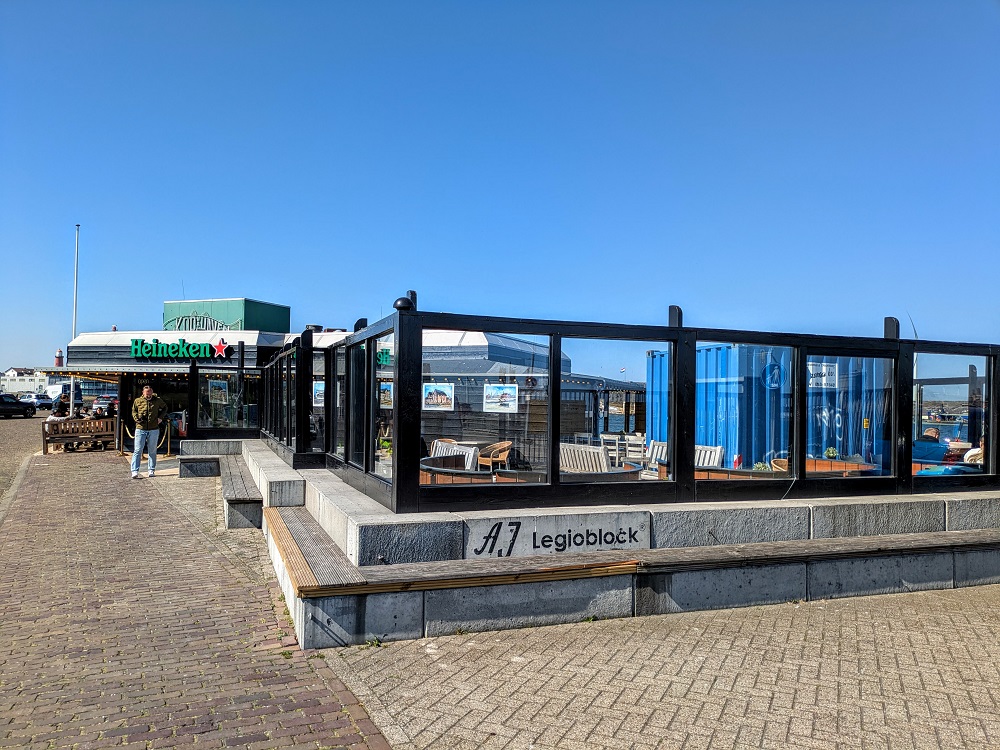
There’s not much in the area to do, although there is a fish and chip shop down to the left which seemed to be popular. There was outdoor seating there which I think is pet-friendly, so it could be a good spot to grab something to eat if you’re hungry before your sailing.
We ended up being glad that we hadn’t waited around at the airport until much later. The ferry wasn’t due to depart until 5:30pm, but they started check in at 1pm. They checked over Truffles’ paperwork quickly and scanned her microchip, then we got the keys to our cabin. These are credit card-sized and are made of thin cardboard. I don’t think they had a mag stripe on them; instead, you simply tap the card to the sensor on your cabin door and it unlocks.
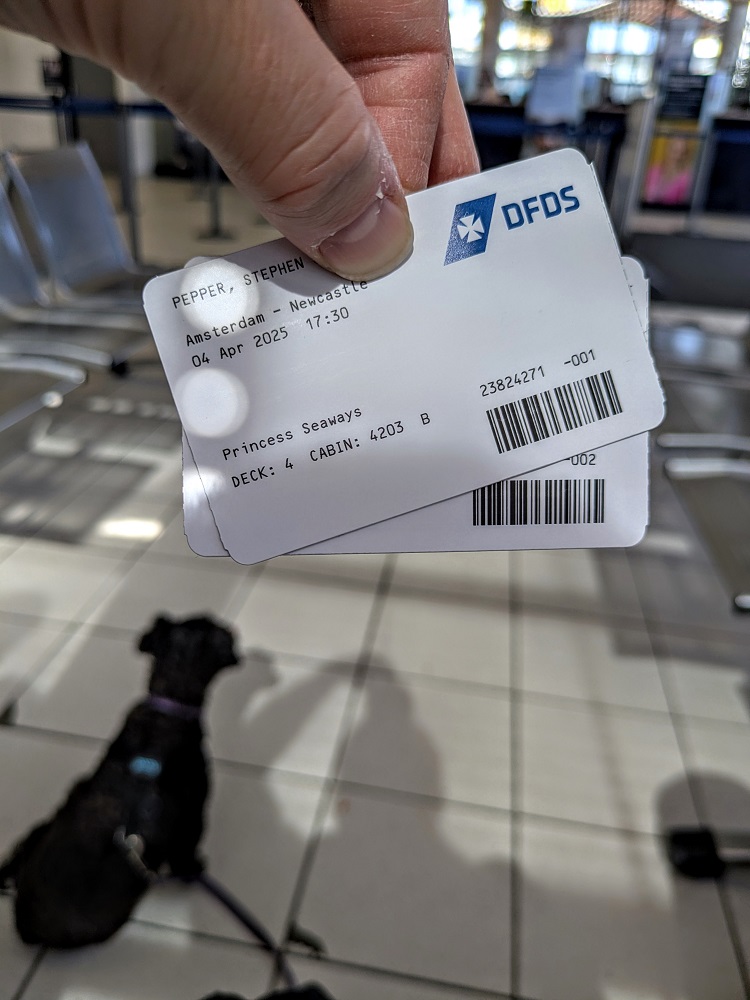
We were also given a booklet that provided everything we needed to know about the pet-related elements on the ship.

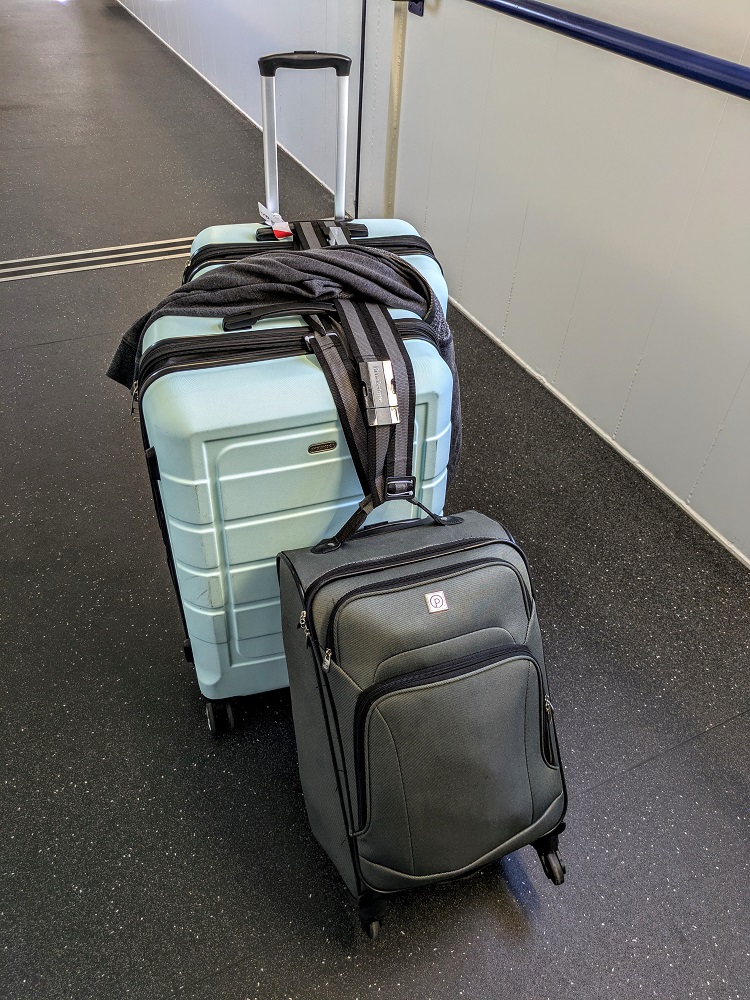
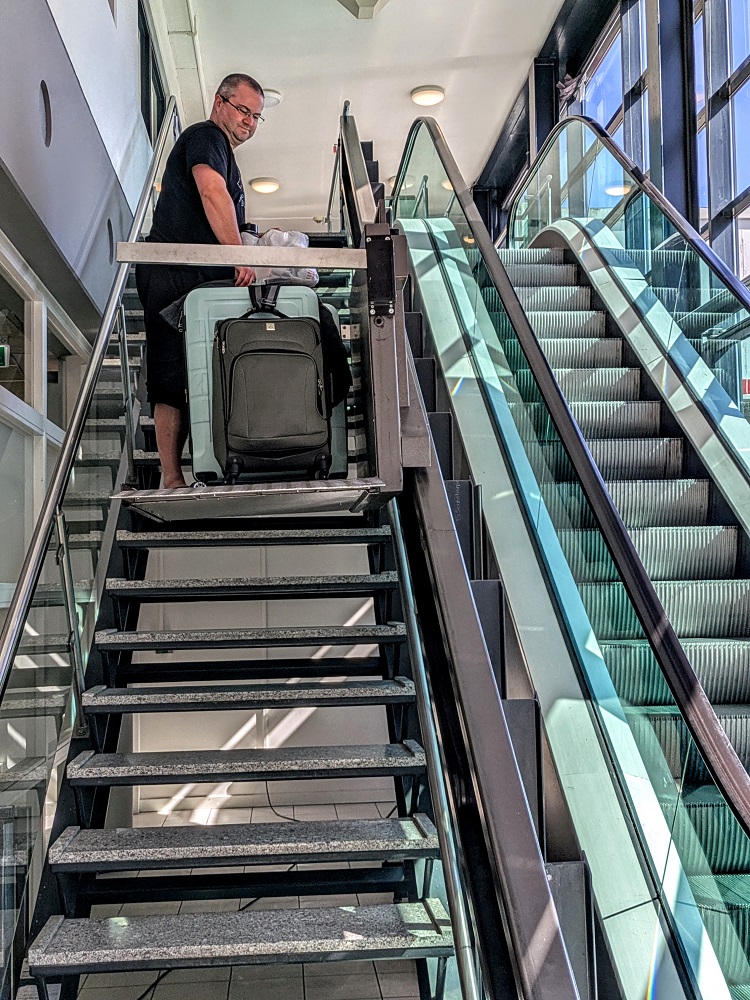
Boarding began at 2pm which was awesome as we’d assumed we’d have to wait at least a couple of hours later than that to access our cabin. You have to be able to get all your luggage on to the boat yourself, so we’d bought some luggage straps to help us maneuver it all more easily.
The agent who’d checked us in did help us out though. Rather than having to wrangle everything up the escalators, she had Shae and I travel up a stairlift one at a time with some of our bags.
After walking along the long gangway on to the boat, we were assisted with our bags by a different DFDS employee. Instead of having to lug all the bags down the stairs from Deck 6 to Deck 4, he took us on a couple of elevators and showed us to our cabin.
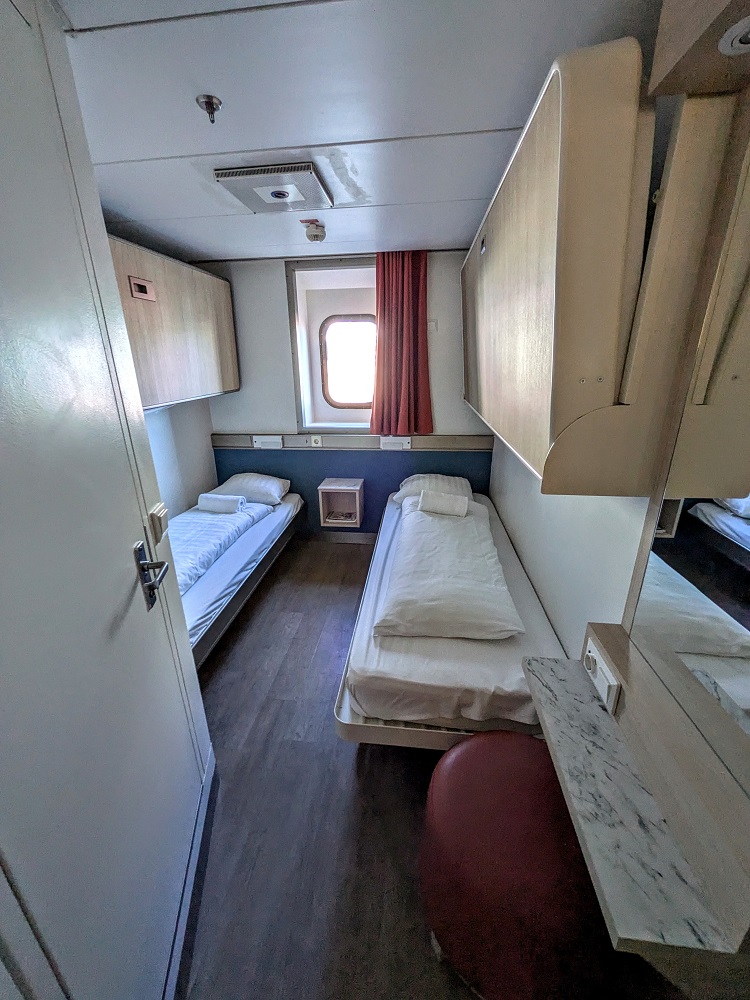
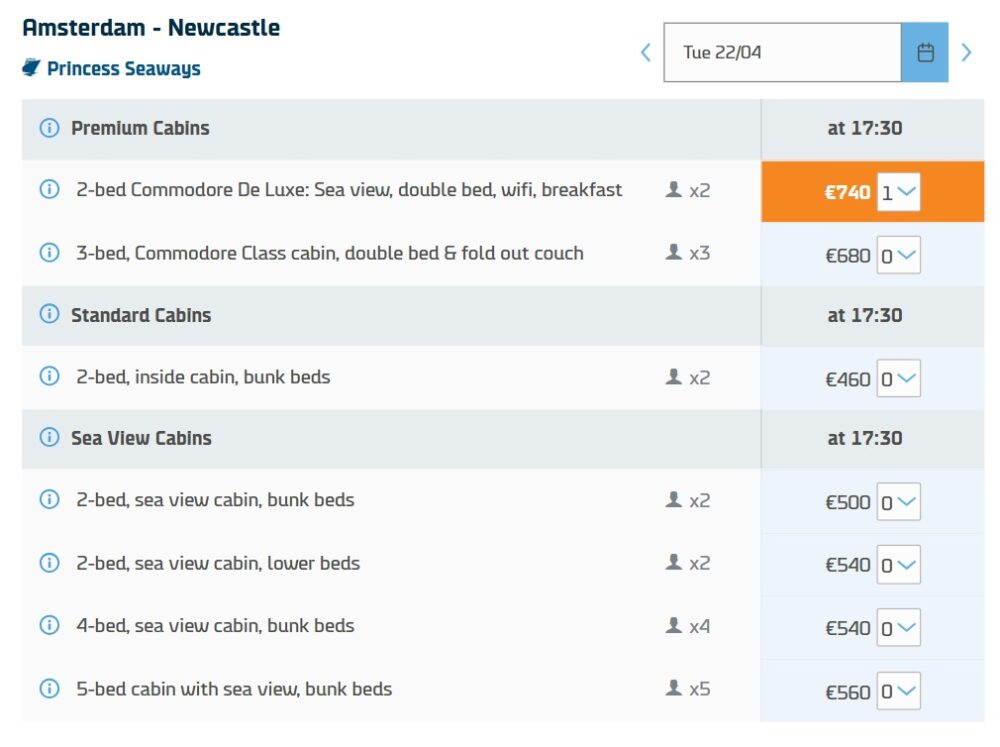
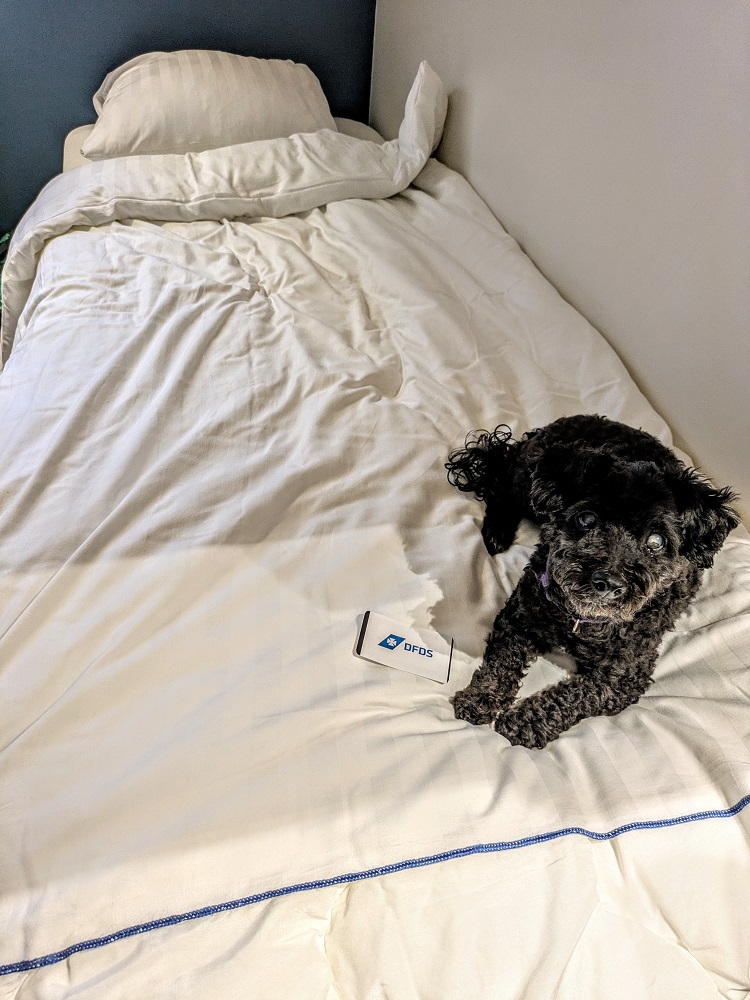
As far as I could tell when booking our own tickets, there’s only one type of pet-friendly cabin. Those have four beds – two beds below and two bunk beds above.
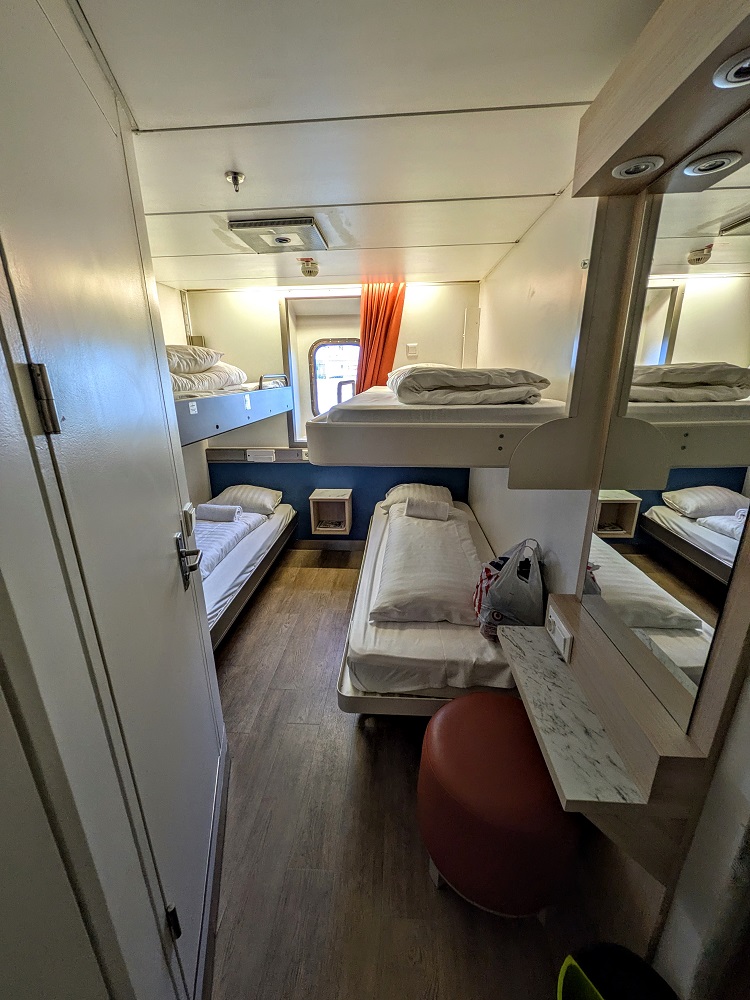
The cabins are cozy and have very limited storage space. In order to have some kind of space to move around in, I lifted all our bags on to the two top bunks. If you happen to have particularly heavy bags, bear in mind the weight limit; 120 kgs is 265 lbs.
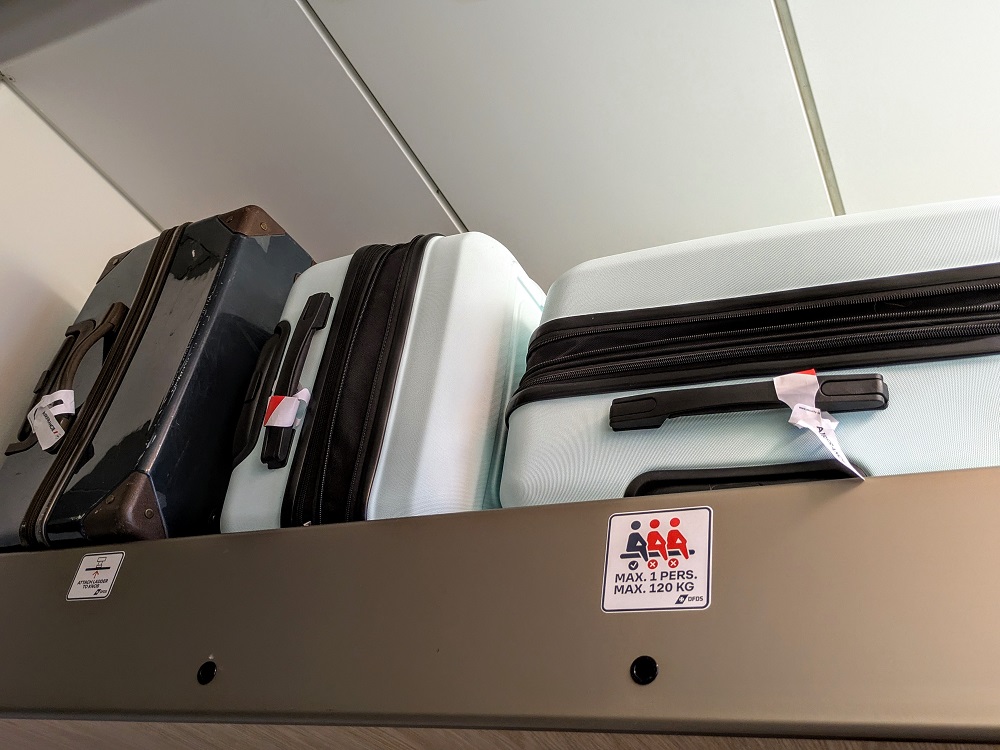
There are a couple of ladders to access the top bunks if needed, along with a rack on which to hang jackets and other items.
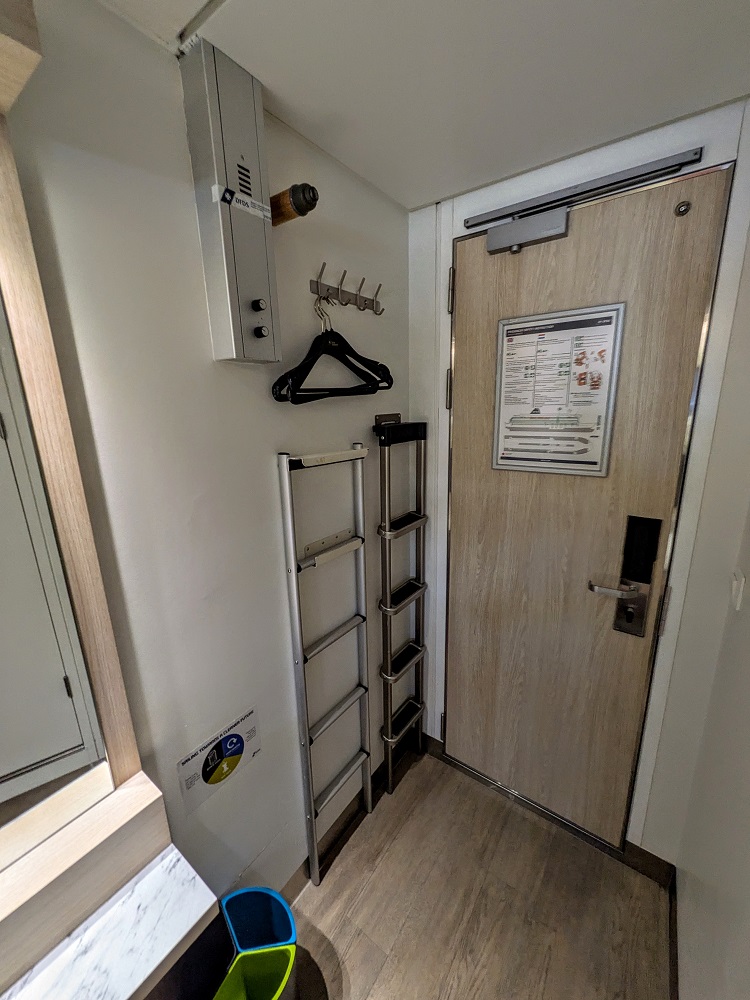
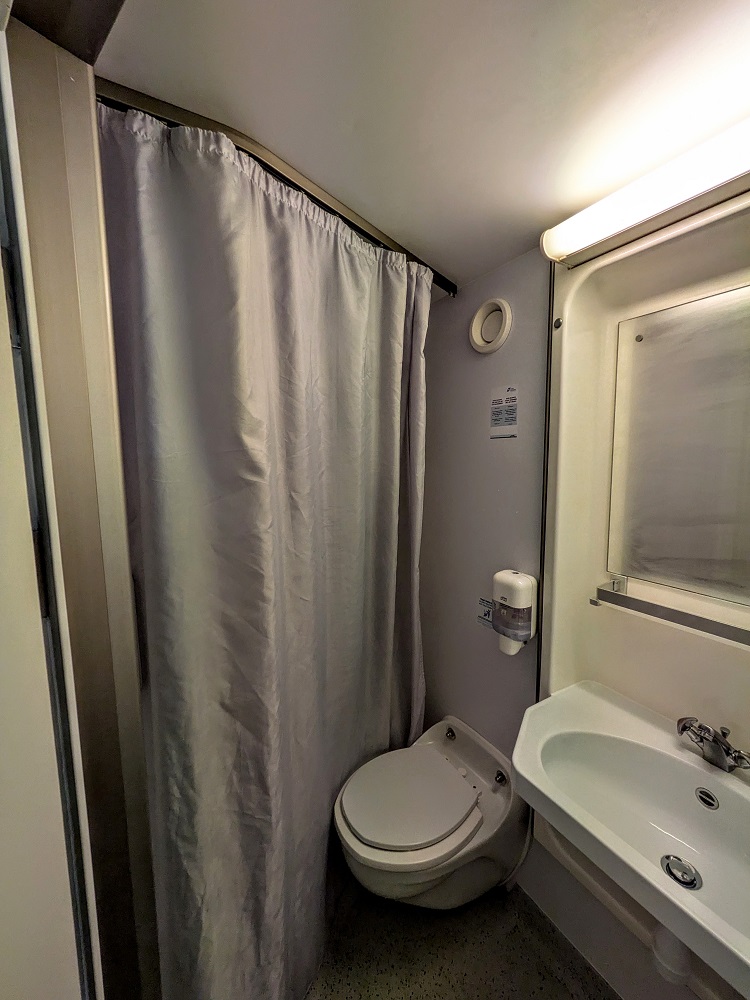
Cabins have their own private bathroom.
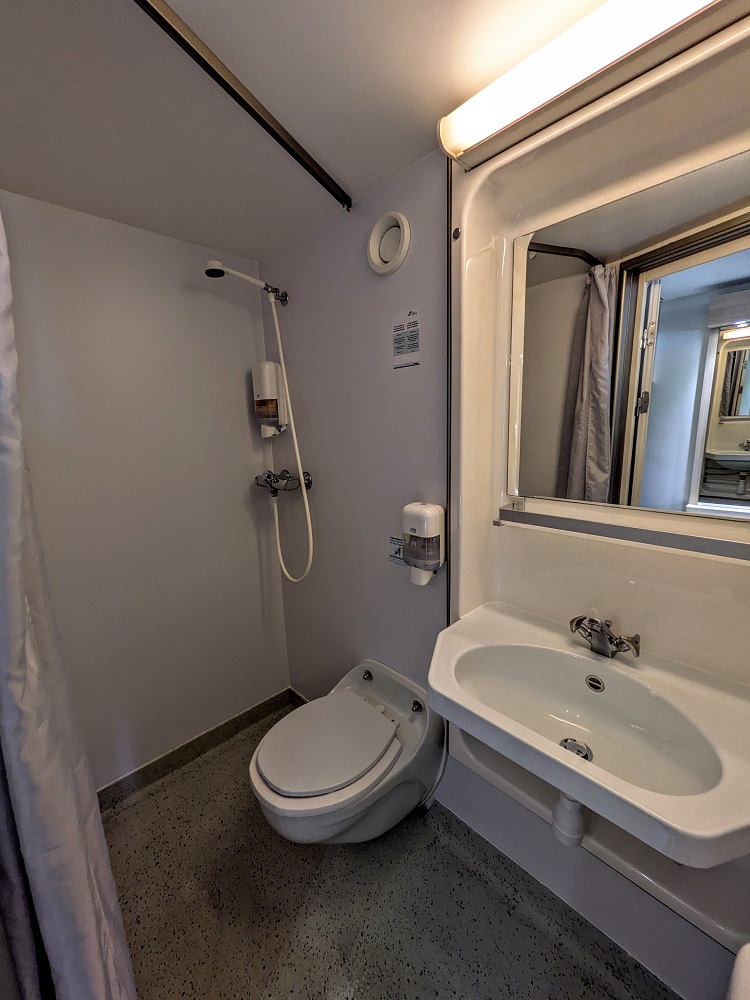
The bathrooms are a wet room which means that the toilet and shower are in the same room. However, the shower curtain does a good job in ensuring the entire room doesn’t get soaking wet, but you probably don’t want to leave your clothes on the floor when having a shower.
The pet-friendly cabins are all on Deck 4 along the same corridor. Dogs aren’t allowed elsewhere on the ferry, other than the pet relief area on Deck 6. To access it, at the far end of the corridor there’s a door leading to the ‘Dog Hotel’ and the pet relief area. The ‘Dog Hotel’ is where you can book a kennel in the event you need to bring your dog on the ferry and a pet-friendly cabin isn’t available.
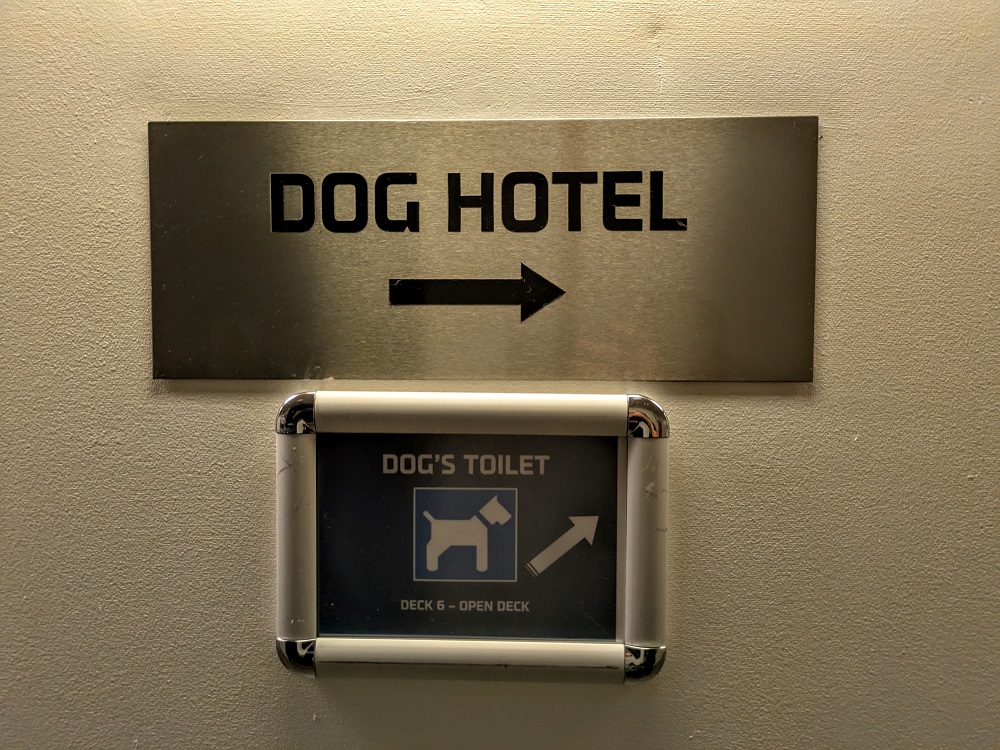
The Dog Hotel is off to the left, while you follow the yellow pawprints around to the right and up the stairs to get to Deck 6.
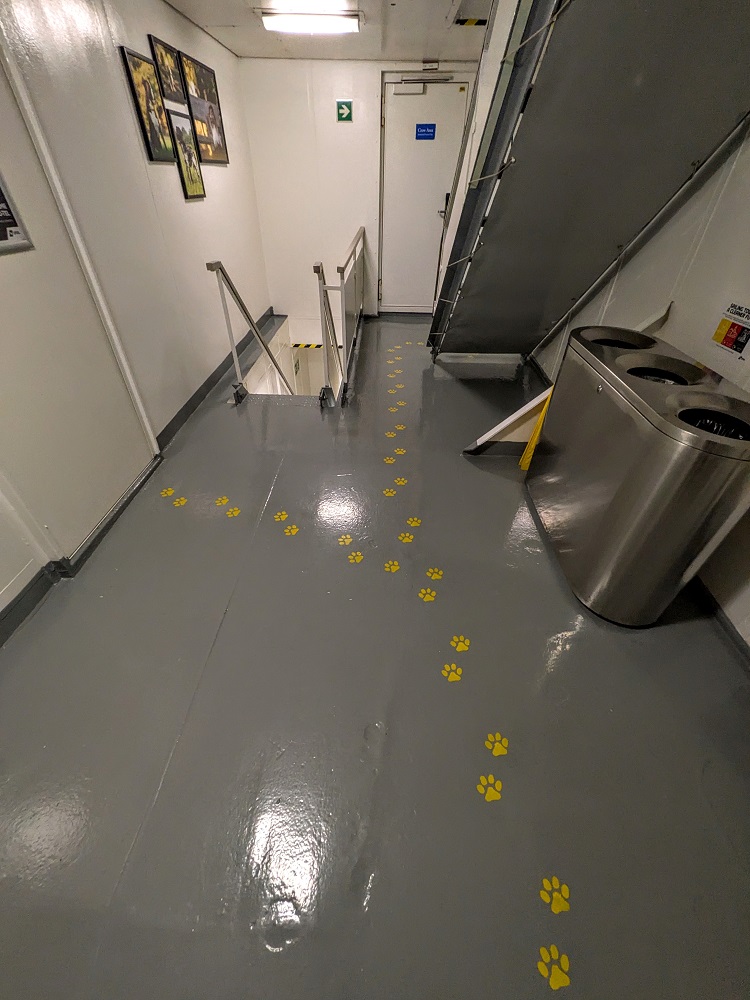
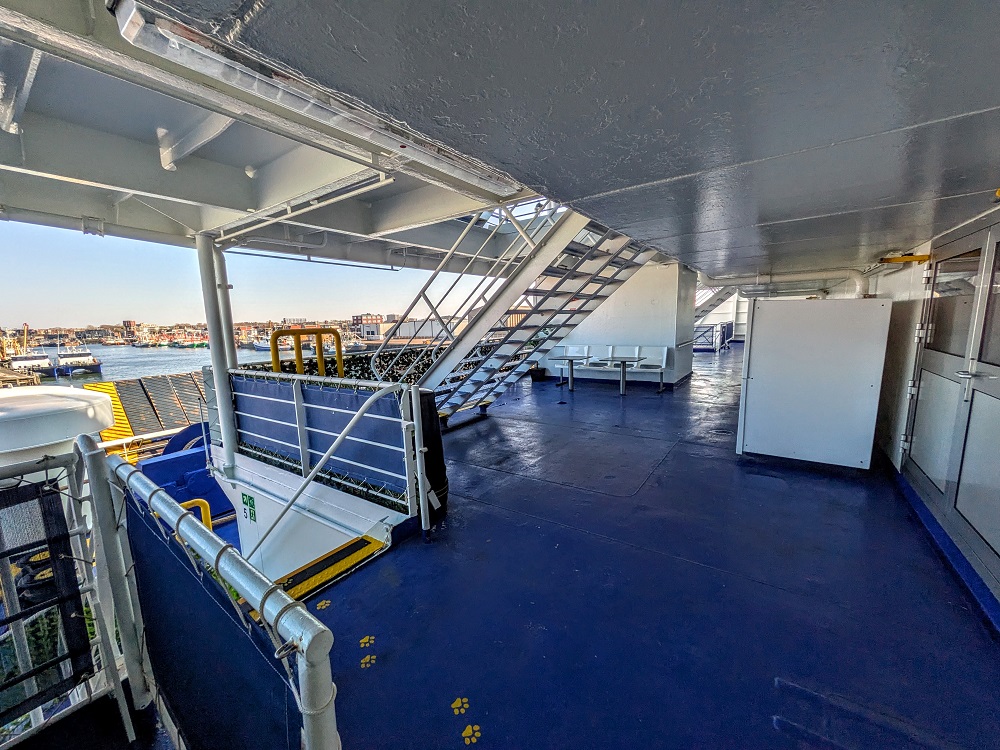
At the top of the stairs on Deck 6, on the right there’s a small raised platform with artificial grass.
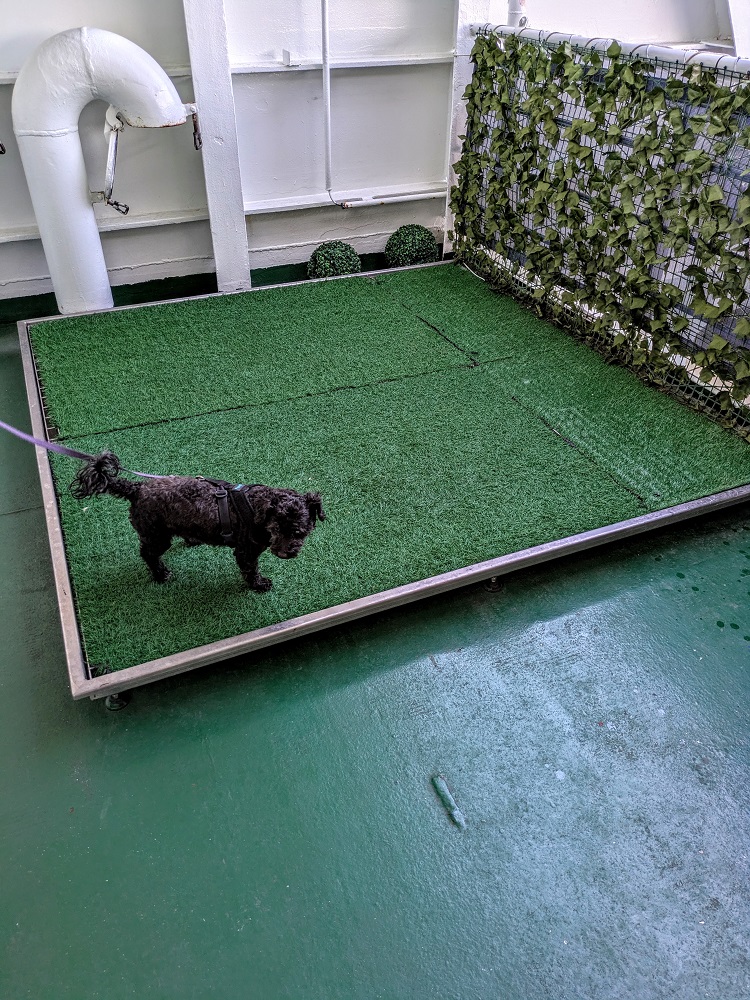
Once again, Truffles was fine with peeing there, but wouldn’t poop. However, walking around on the pet-friendly part of Deck 6 did the trick both that evening and again in the morning to get her to poop.
Considering we were able to board so early, after taking Truffles up there we headed back to the cabin to take a well-deserved nap before the ferry departed.
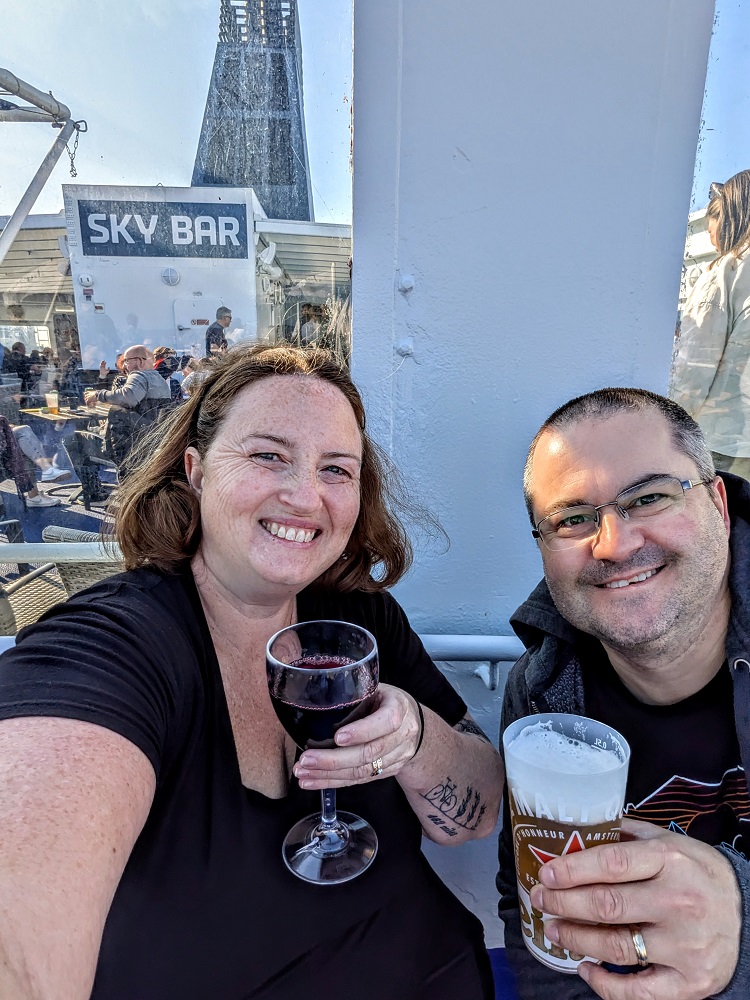
It ended up being a great sailing. We had dinner at the Explorer’s Kitchen buffet and had breakfast there the next morning. There was a great selection of food during both meals and the quality was better than I’d expected.
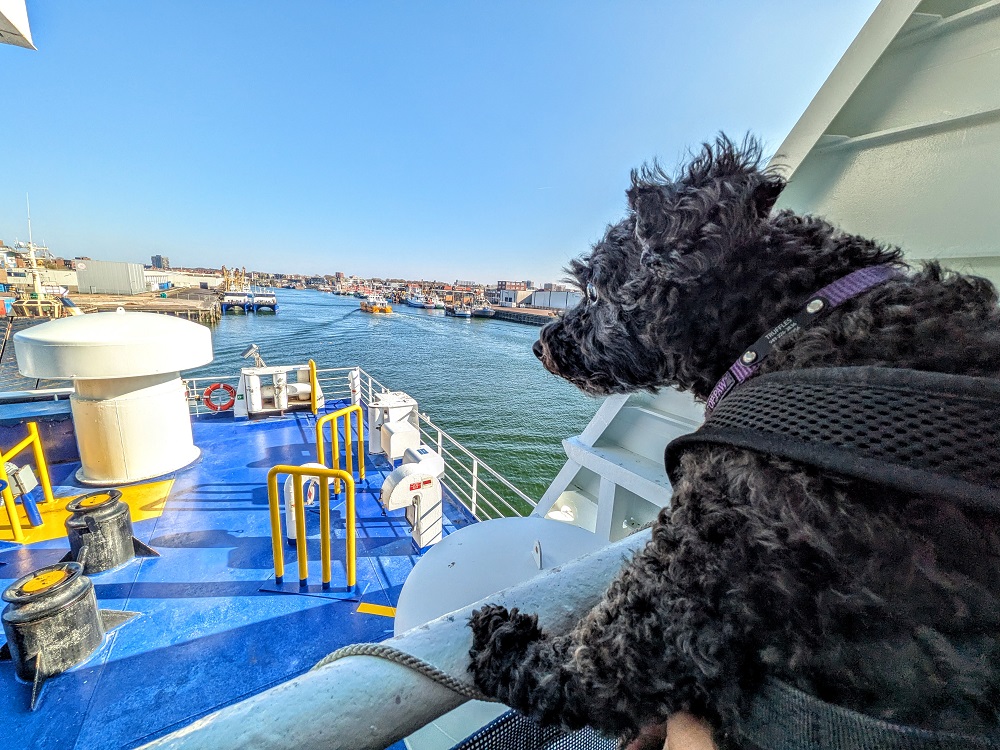
The ferry has all kinds of entertainment, from kids activities to two cinemas showing a total of six movies to a pub to a nightclub and more. We had a drink at the Sky Bar on the top deck as we departed from Amsterdam…
…then had dinner at Explorer’s Kitchen…

…before retiring for the night in our cabin.
I’d highly recommend taking Dramamine before setting off. I’m very sensitive to seasickness, but I was fine having taken one pill of less-drowsy Dramamine before departure.
Truffles did pretty well overall with the sailing. She didn’t seem to get seasick despite slightly choppy water at times, but she did feel the need to vocally express her displeasure at some of the other barking dogs in nearby cabins.
I wrote an even more lengthy review of our DFDS ferry experience over on Frequent Miler, so I recommend checking that out to get an even better idea about what to expect on board.
Immigration & Customs With A Dog At Newcastle Ferry Terminal
After arriving in Newcastle, we had just one more thing to do – go through Customs with Truffles, this time in the UK. This was the final big test – had we gotten all our ducks in a row?
I guess we had, because it turned out that the paperwork check and microchip scan that was done when checking in for the ferry was seemingly all that was needed. When arriving at the immigration desk in Newcastle, we provided our passports and told them that we had our dog with us. They checked our passports, but didn’t check any paperwork relating to Truffles. I guess what might’ve happened is that they thought we’d left the UK initially with Truffles and that she was just returning as an existing UK pup, rather than being moved into the UK. Either way, that final step was no problem at all – Truffles is now a UK resident!
Getting From DFDS Ferry Terminal In Newcastle To Elsewhere With A Dog
Shae and I still haven’t (at the time of publishing this post) decided on where we want to live in the UK. We were going to spend a week or two at my parents’ place, but before that we decided to spend a few days in Hull. That’s on our list of potential places to live due to it having a low cost of living, but neither of us had ever been there before.
Hull is about 2.5 hours south of Newcastle. To get there, we rented a car from Newcastle airport, but that meant we had to get from the ferry terminal to the airport. We therefore used Uber to arrange a ride. Uber has a specific pet-friendly option, but we chose an Uber XL as we knew we’d need a large vehicle; we were worried that ordering a specific pet-friendly car would result in something too small to fit all our luggage.
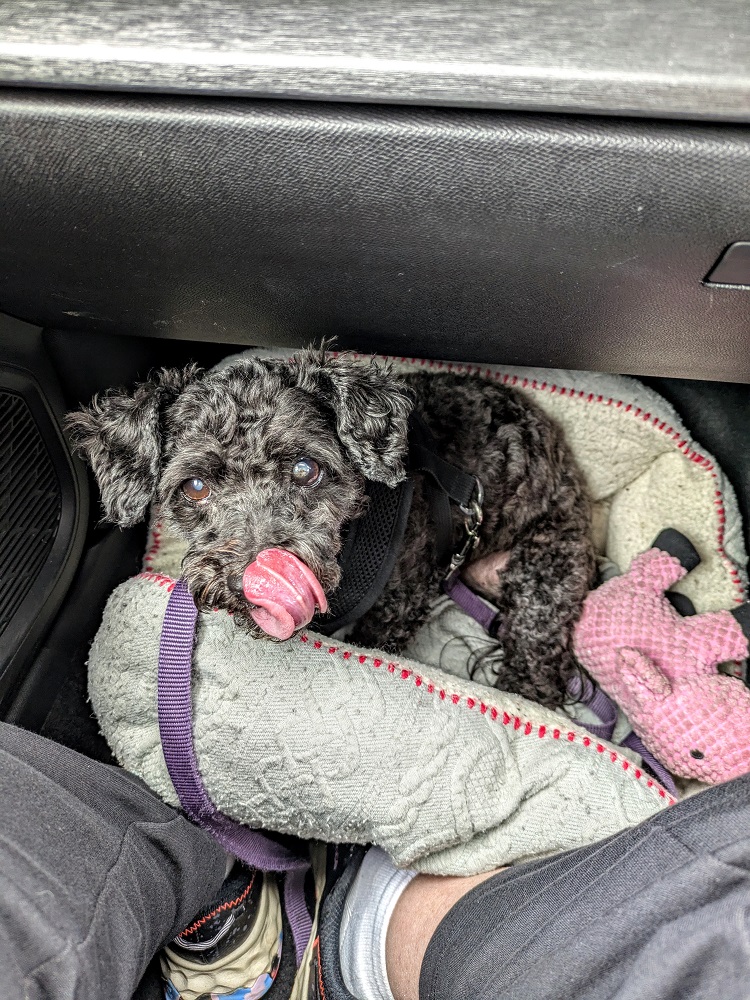
Just in case the driver would have a problem with a dog being loose in their car, we put Truffles in her carrier. The drive to the airport took ~25 minutes and we were soon on our way in the rental car.
One quick thing to note. We rented from Enterprise as we were able to make it a one-way rental, dropping it off a couple of miles from my parents’ house a week later. After organizing the paperwork, we were shown to the car by a different agent. As she gave us the keys, she mentioned that dogs weren’t allowed in the car.
Oops.
She didn’t actually know we had a dog with us as Truffles was still in her carrier on Shae’s back – she was simply letting us know that dogs weren’t allowed in the car. It’s possible that we didn’t say anything and just loaded our stuff and drove off without them being any the wiser. Truffles is hypoallergenic and so doesn’t shed, meaning no fur would be left in the car. We also kept her on the floor on the front passenger side or on the passenger’s lap so that her nails wouldn’t scratch any of the interior.
One of the funniest things about moving to the UK is that Truffles is really confused by the driver and passenger sides being switched compared to the US. In the US, she loved sitting on the lap of the passenger and looking out of the window to the right and she knew she wasn’t allowed on the left hand side of the car where the driver was.
Here in the UK, she keeps wanting to move to the right hand side where the driver is because she’s never been allowed on the left. When sitting on the passenger’s lap, she keeps facing to the right like she’s used to, even when we open the passenger side window. I’m sure she’ll get used to it eventually, but it’s been funny seeing her brain not make the switch yet.
Any Questions?
I tried to provide as much information in this post as I could about our experience in the hope that it helps anyone looking to make a similar move from the US to the UK with their dog. Let us know if you have any questions in the comments below though and we’ll do our best to answer them. We’re certainly not experts on all of this and so we might not be able to answer questions about the intricacies of your personal situation/requirements, but we’ll hopefully be able to point you in the right direction at the very least.
I’ve also included a list of some important and useful links below that you’ll want to refer to.
Useful Links
- UK government website: How to bring your pet to Great Britain. This is the intro page providing links to all of the rules
- UK government website: Approved air routes for pet travel. This page lists all of the airlines that are approved to transport dogs in the hold of the plane, along with a list of all the charter airlines approved to transport dogs in the cabin. With regards to the latter, it lists the airports in the UK that each of those airlines flies into, but it doesn’t give any indication as to which ones fly from the US to the UK.
- UK government website: Sea and rail companies and routes. This page lists all of the different routes and companies you can travel on with your dog.
- EU website: Travelling with pets – dogs, cats and ferrets. This page lists the EU’s requirements for traveling through an EU country. These rules are in addition to the UK’s requirements.
- Amazon: Pet carrier (the one we did use – our affiliate link)
- Amazon: Pet carrier (the one we originally bought but didn’t end up using – our affiliate link)
- DFDS: Amsterdam to Newcastle ferry information & booking (our affiliate link)
- Frequent Miler: My review of our ride on the DFDS ferry from Amsterdam to Newcastle
- Facebook group: US Pets to UK via Chunnel & Alternate Routes. Joining this group was handy because a lot of people have the same questions you might have and there are a lot of helpful answers. We didn’t ask anything in there before our trip, but reading through various posts was a good sanity check that we had everything in order ahead of time.
Big adventures for Truffles!
And hopefully the start of many more 🙂